Repossession and Collateral Management Microjourney
Repossession is a costly and highly regulated process that all parties would prefer to avoid, but it's also necessary with a small percentage of customers.This microjourney enables banks to effectively manage the process of repossession, which requires access to loan information, payment history, collateral, and valuation information. The process also involves customer communication, review and approval at different stages.
This microjourney covers the following topics.
- Business value
- Required applications
- Personas and usage
- Channels and usage
- Example usage
- Stages and steps
- Data model
- Enabling the microjourney
- FAQs
Business value
Repossession and Collateral Management Microjourney saves a customer service representative (CSR) time by automating the process of sending initial “right to cure” correspondence, reminders, and where necessary, giving collections agents the necessary loan and collateral information in order to decide whether or not to repossess. With greater automation and efficient workflow, agents and the overall operation are more productive.
Required applications
- Pega Customer Service™ for Financial Services v8.4
- Pega Marketing ™ for Financial Services v8.4
Personas and usage
- Retail customer – Pega Collections Repossession out of the box is configured for a retail auto loan use case, but it can be modified to support commercial or other industry needs.
- Collections agent – Customers who have exceeded the time limit on the right-to-cure process are routed to a Collections Agent workbasket.
- Back-office collections analyst/approver – The default configuration has repossession decisions routed to a different resource than the front-line agent, which is typical. The workflow can be modified as needed.
- Agency – Cases that are approved for repossession are moved to a Pending-Agency work queue, and by default are batched to a file to be sent to an external agency, if the case type is configured to route to agency.
Channels and usage
- Email – By default, repossession processing uses email to communicate with defaulting customers about their right to cure.
- Call center – By default, right-to-cure letters encourage customers to contact the bank by phone.
Example usage
Initializing Involuntary repossession
- If a customer’s loan account is in collections for 90 days, Customer Decision Hub triggers a right-to-cure (RTC) letter to the customer.
- If the customer takes no action during the next 14 days, Customer Decision Hub initiates the repossession process and assigns the case to a Collections analyst or manager for further processing.
- Collections analyst or manager picks up the repossession case from the Repossession workbasket and reviews the loan details and collateral details before submitting it for approval.
Initializing Voluntary repossession
- A customer whose loan account is in collections can voluntarily call Customer Care and request initiation of repossession of the collateral to close the loan account.

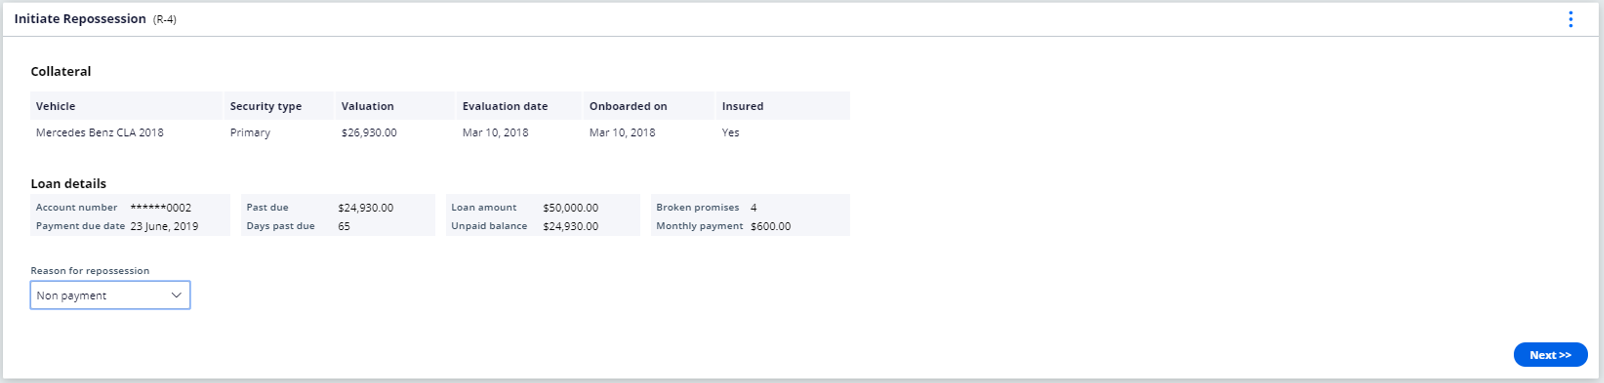
- The CSR reviews the collateral details and captures the reason for repossession.

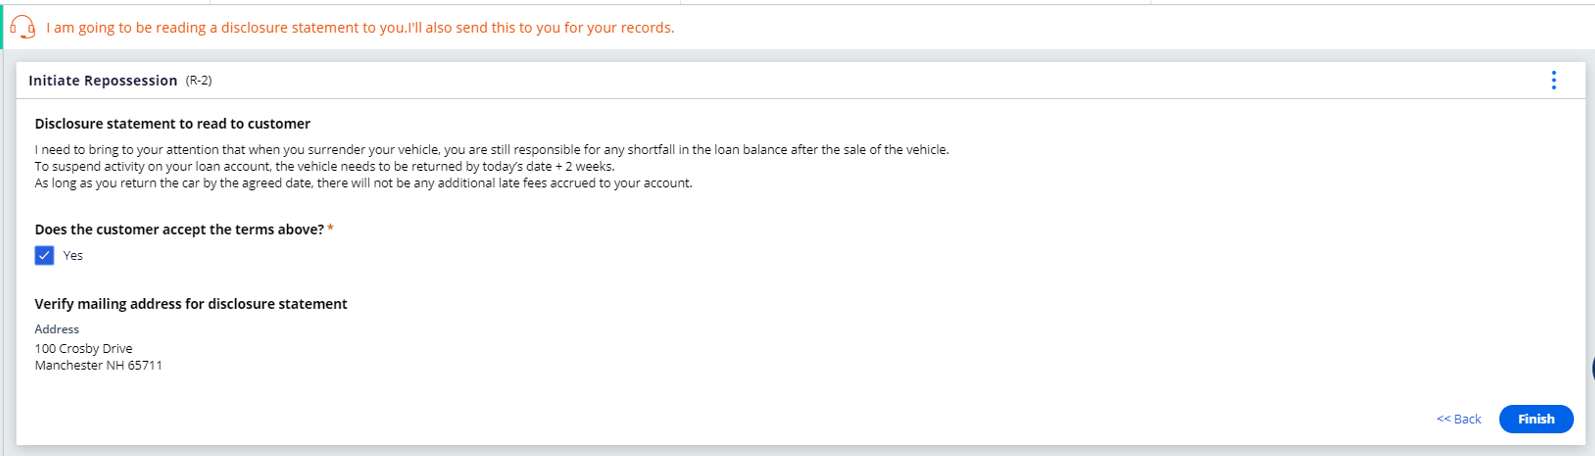
- CSR reads the disclosure statement (if any) and reads the next steps before submitting for approval.
Approval of repossession
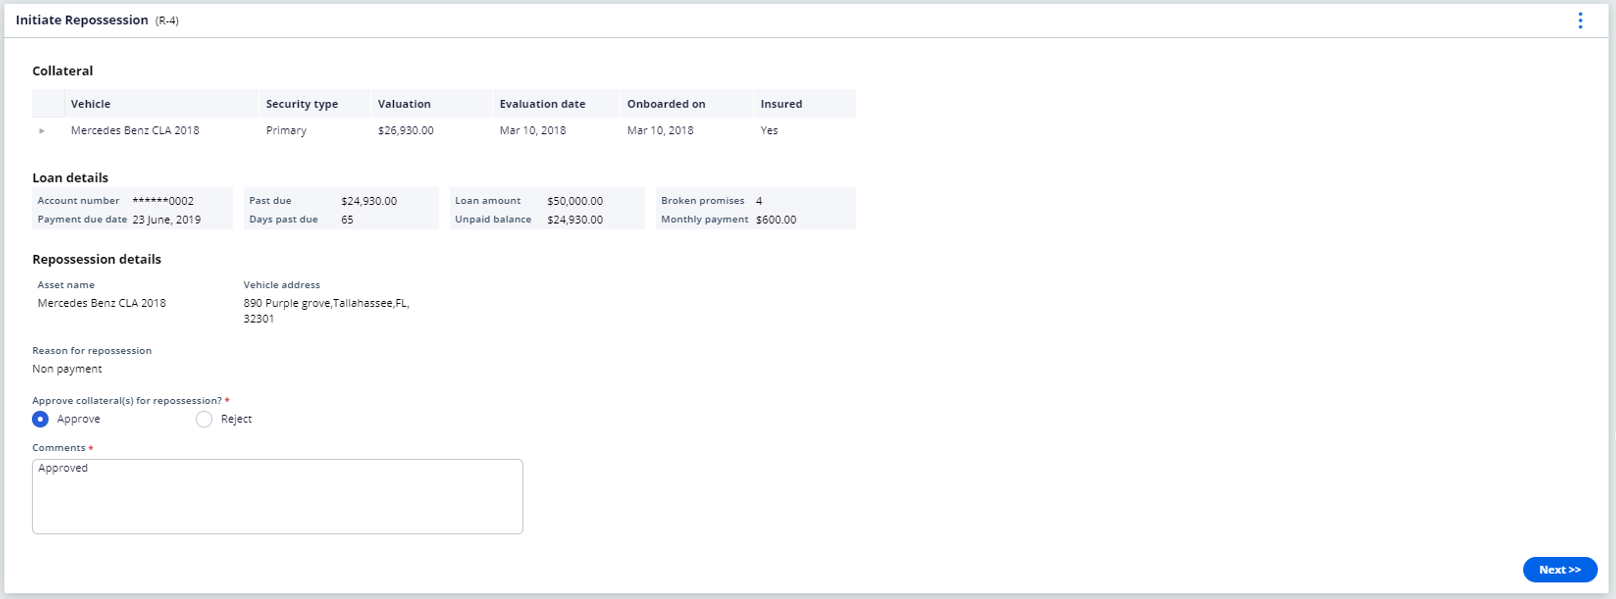
- A Collections Manager / Supervisor reviews the details and approves or rejects the repossession of the collateral.
Stages and steps
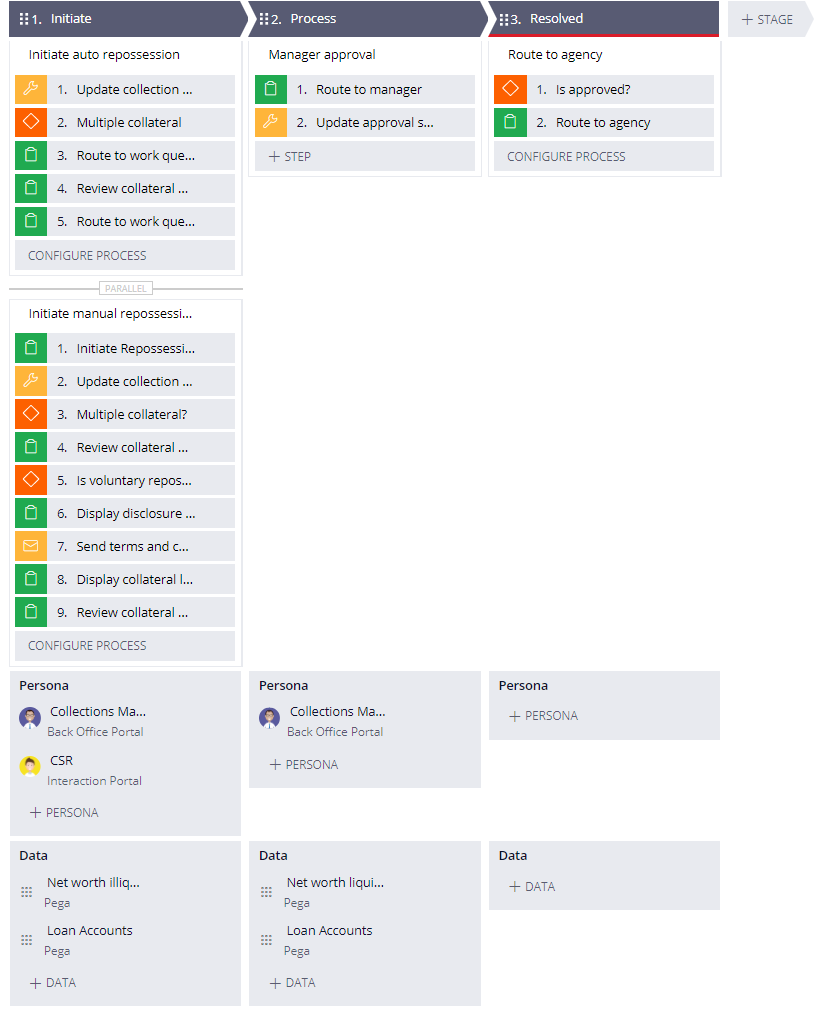
The three stages of the case flow are described here and shown in the screenshot.
- Initiate – Includes both processes for initiating repossession automatically or manually and select the collateral.
- Process – Involves a collections manager or approver to approve the repossession of identified collateral.
- Resolution – Involves a configurable process to transfer the case to an external agency for repossession of collateral.
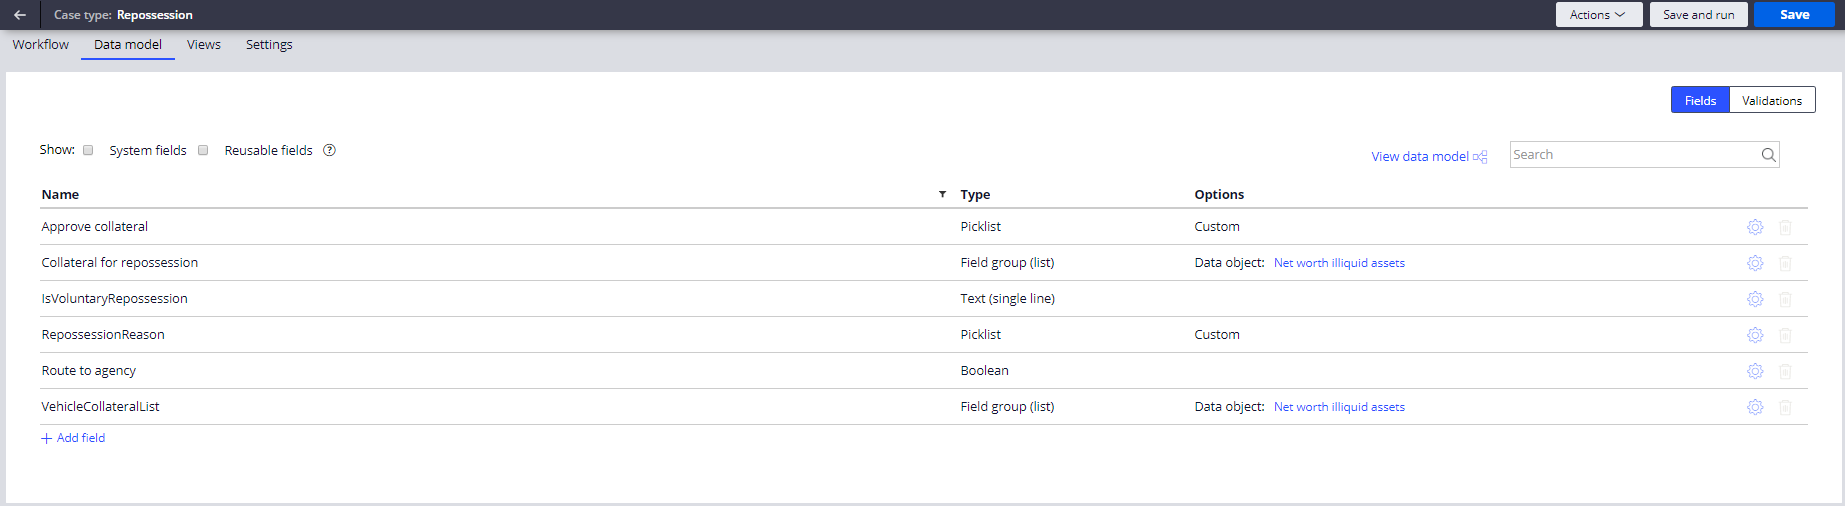
Data model
The Data model tab of the Repossession (in the screenshot below) case type displays data objects used.
Enabling the microjourney
At the minimum, this microjourney requires the list of collaterals associated with the loan account of a customer. This section lists and describes the two extension points that fetch the collateral list in different scenario. Other extension points are described in FAQ section of this document.
- To get list of collateral associated to a loan account from an appropriate source, extend the Activity GetCollateralsForLoan, which is provided as an extension point.

- To get the details of a specific collateral from an appropriate source, extend the Activity GetCollateralList, which is provided as an extension point.

FAQs
What are the common extensions?
This section lists and describes extension points in this microjourney that can add additional integrations and automation in your implementations.
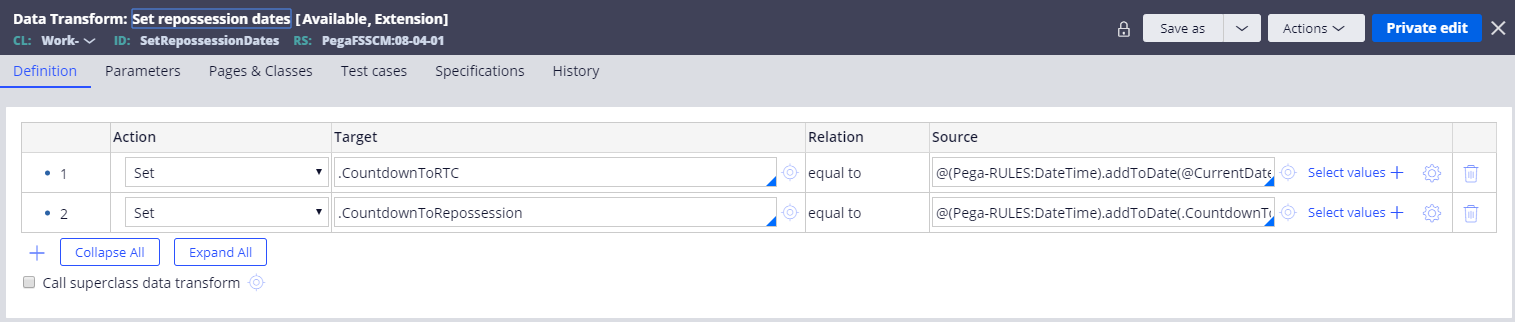
- To modify the countdown time for initiating the repossession process, extend the Data Transform SetRepossessionDates.
- To customize the process of physical repossession of the collateral when the repossession is approved, extend the RouteToAgency flow.
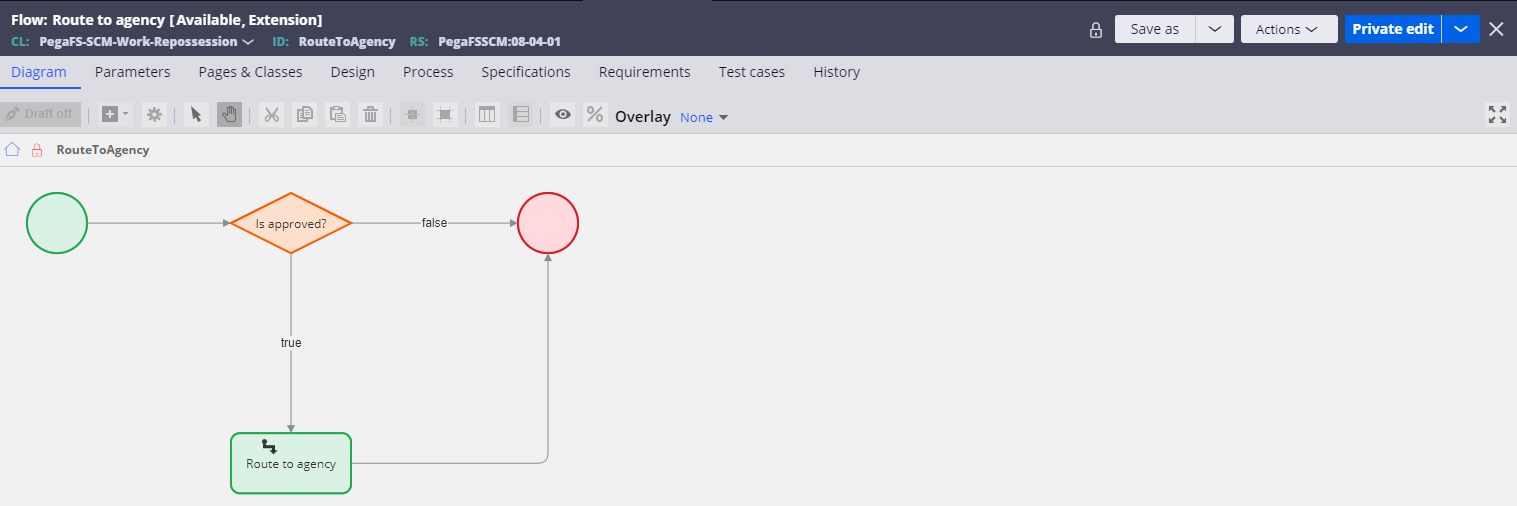
- By default, execution of the RouteToAgency flow is disabled. To enable this, set the value of RouteToAgency to true in the Data Transform SetRouteToAgency, which is provided as an extension point.

Previous topic Pega Customer Service for Financial Services modified rules for BAC prevention Next topic Travel Notification for Retail Banking Microjourney