How to create and subscribe to business events
Introduced in PRPC 6.2, business event definitions allow users to monitor their operations by automatically detecting business conditions and triggering specified processing.
A business event definition monitors and responds to events of interest in your application that may not be easily represented as procedural steps in workflows, activities, and so on. Such events:
- may occur at any time
- may refer to patterns of events involving multiple changes to work items
The business event definition comprises both the conditions and resulting actions of a business event. For example, the event condition could be whenever a work item in the Adjustments application becomes resolved with a status of Resolved-Writedown and the principal amount is more than $10,000. The related action could be that the system sends an email notification to a specific group of people.
Privileges and access
To make use of event definitions, you need:
- Access to a portal that includes the business events gadgets and functionality, in order to create event definitions. The Case Manager portal includes these features by default, and is used in this example.
- Appropriate privileges. Privileges required for working with business event definitions are The standard roles PegaRULES:SysAdm4 and PegaRULES:WorkMgr4 provide the required privileges.
- PegaAccel-CEPSetup.pxViewEventDefinitions
- PegaAccel-CEPSetup.pxEditEventDefinitions
- The Events Processing RuleSet. The single RuleSet version, EventProcessing-Internal:01-01-01 serves all application users who work with event definitions. Add this RuleSet version to the application RuleSet list of your access group.
Additionally, the System Work Indexer agent must be running. To check the status of the agent:
- Click
 > System > Settings > Search.
 - Locate the SystemWorkIndexer entry in the Agent Administration section. If it is stopped, click Start to enable it.
Furthermore, every operator wanting to receive notifications by email must have a valid email address listed in their Operator ID.
Follow the example in the section below to see how a manager can create, subscribe to, benefit from, and manage a business event definition.
Suggested approach
You, as a manager, want to know when anyone using the application creates or updates a work item. To accomplish that, create a business event definition that will send a notification every time a work item in the application changes, using the following steps:
- Locate the business events
- Create a business event definition
- Subscribe to the business event
- Debug the business event
- Update the business event
- Delete the business event
1. Locate the business events
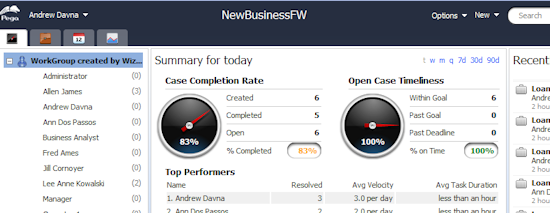
In Process Commander, open the composite portal that you have access to, which includes business event processing features. In the Case Manager Portal, you get a display like this:
Open the My Events tab  and click
  . The Event Definitions gadget appears:

This gadget lists all active Business Event definitions for the application. In steps 3, 5, and 6, below, you can explore the features available on this gadget.
2. Create a business event definition
Click the New button. A tab headed New appears:
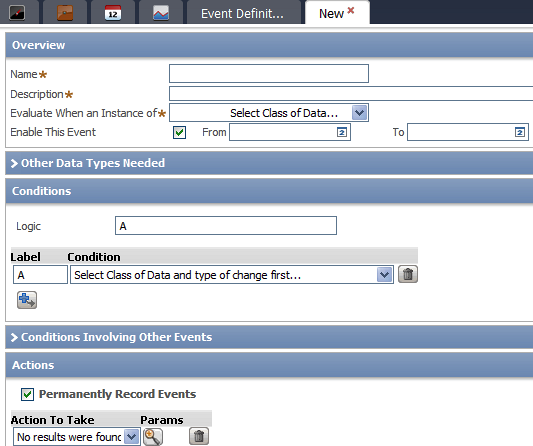
The form has five sections, although for many event definitions you will not need the two that are collapsed by default: Other Data Types Needed and Conditions Involving Other Events.
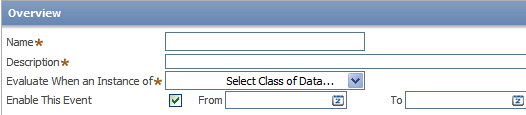
Overview
The Overview section holds the basic information about the business event to watch for. Fields marked with a star are required:
- Provide a name and description for the business event in the fields provided.
- Select a work type and the sort of change to that work type that the business event is to watch for. The type of change options are:
- is created or updated
- has a new attachment
- has new correspondence
- has failed to meet an assignment goal
- Check the Enable This Event checkbox to make the event definition active. Uncheck it to deactivate the event definition.
- If you want the event definition to be active for a certain time period, check the checkbox and provide start and end dates in the fields provided.

Other Data Types Needed
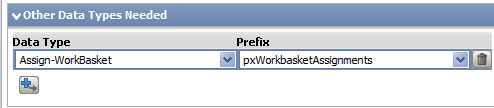
When you are setting the conditions that have to be met for the event definition to perform its assigned action or actions, you may need to compare some value in the work item with the value of some other property not in the same class. To prepare for this, expand the Other Data Types Needed section.
- In the Data Type field, select the class that holds the property you want to use.
- In the Prefix field, select the prefix for the property you want to use.
Conditions
You may want to have the event definition take action only under certain conditions, such as when the person doing the update to a work item has a certain Operator ID. The Conditions section allows you to establish a series of conditions and specify the logic relating them (such as A AND B NOT C) in the Logic field.

In the example below, the event definition will only take action if:
A: the current effort estimate equals the effort estimate when the work item was added to a workbasket (drawing on a property specified in the Other Data Types Needed section) AND
B: the urgency for the work item has increased.
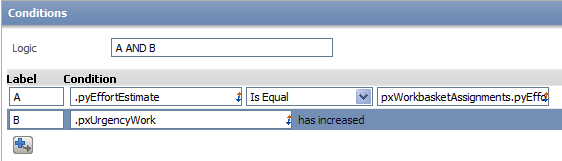
You can establish precise conditions to ensure you get the alerts you want to see without getting inundated with information about other events.
If you do not want to establish limiting conditions, delete all the lines in this section and remove the entry in the Logic field.
Conditions Involving Other Events
You can add a condition involving other data that gets checked once the conditions you established above are satisfied. You can specify a Report Definition report and set conditions that have to exist for that report before the event definition is satisfied.
- Check the If above conditions are met... checkbox.
- Select a Report Definition report to use.
- Select the run specification. Your options are:
- Now. This runs the report immediately.
- In [n] days. Select this option and provide a number in the field that appears The event definition checks for results for this report in the next n days that satisfy the condition you established.
- In [n] hours. Select this option and provide a number in the field that appears The event definition checks for results for this report in the next n hours that satisfy the condition you established.
- Specify the conditions for the report: whether it returns more than, fewer than, or exactly the number you provide.

Actions
Once the conditions you set have been satisfied, the event definition executes the actions you specify here. You can specify one or several actions.
Check the Permanently Record Events checkbox to have the events saved as part of the data of a summary report.
The action choices are to:
Click the magnifying glass icon beside each action you establish to provide the parameters and other information it requires.

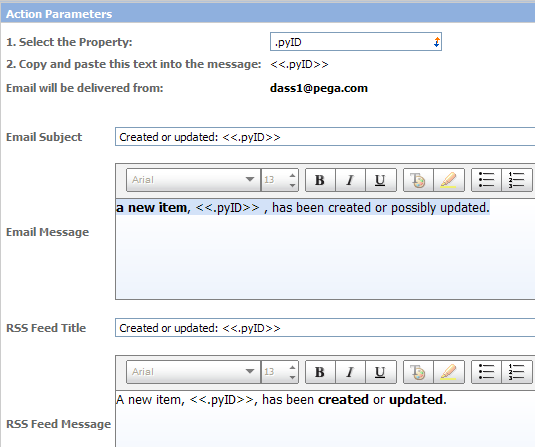
Notify subscribers
Subscribers can opt to get notifications by email, in an RSS feed, or in a standard report. You provide the formatting and content for the alert that appears by email or through RSS.
To send email, your system needs an outbound email configuration. Select the Pega menu > Integration > Email landing page to review or establish this configuration.
Note that you can select properties in the field at the top of the form, and then copy correctly-formatted text to use them as variables in your message.
The result is available as an email or RSS feed:
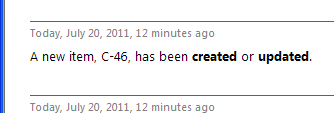
Be sure to provide a meaningful message for both formats. If you overlook this step, subscribers will see mystery entries like these:

Start a flow or activity
You can add an action to start an activity or a flow. Click the magnifying glass icon to set the parameters.
In the fields provided
- Select a flow or activity to execute
- The access group field defaults to the one associated with your Operator ID.
- If the flow or activity you selected requires parameters from the work item, identify the parameters using the SmartPrompt control, and copy and paste the resulting string (such as <<.pyID>>, as in the image at the of the Action Parameters form, above) into the input field provided.
Click OK to create and save the business event definition. Click Cancel to leave the form without saving your work.
3. Subscribe to the business event
To subscribe to an event definition, on the main Event Definitions display click the  icon in the Subscription column to the event definition to which you wish to subscribe, or for which you wish to update your subscription. The Event Subscription form appears:

Control | Description |
|---|---|
| Subscribe to event definition | Check this checkbox to activate a subscription. Select one or more of the forms of notification:
|
| Notify only if my role is: |
If you check this checkbox, select the role that you need to have in relation to the work item triggering the event, in order to get a notification. The options that appear are work party roles that can be specified in the work item or its case hierarchy, so the list will vary from one event definition to another. |
 link above the listing of available event definitions.
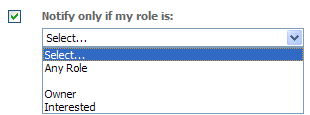
Click Submit to save your settings and establish the subscription. Click Cancel to leave the form without saving your changes.
4. Debug the business event
You may want to verify that the business event definition catches the correct event and initiates the correct action in response. To test the event definition, use the debugging features:
- Select a work item to test with, and note its work item ID.
- In the list of existing business event definitions, select a row, then click the
 icon in the Debug column to display the Debug form. Enter the work item ID in the Debug Info for Item field, and click Submit.
 - Perform an action on the work item that should be detected by the event definition. For example, if the event definition is watching for a "create or update" event, advance the work item in its flow or update its data.
- Click the Debug Log button to display the Event Debug Report.
- If the event definition is correctly configured, and if the system performed an action on the selected work item that stimulates the event definition, an entry appears in this report.
For each row, the report displays the
- Event Definition ID
- Event Definition Name
- Event Object ID
- Work Item ID
- When the event was triggered
To see additional information about the work item involved in the event, hover the mouse over the SmartInfo icon at the left of any row.
5. Update a business event
On the main Event Definitions display, double-click the event definition you wish to edit. The Update Event Definition form appears in read-only mode.
- Click Edit at the bottom of the form to switch to edit mode.
- When you have updated the form, click Save to save your changes.
- Click Cancel to abandon your changes and close the form.
6. Delete a business event
On the main Event Definitions display, double-click the event definition you wish to delete. The Update Event Definition form appears in read-only mode.
- Click the Edit button at the bottom of the form to switch to edit mode.
- Click Delete to delete the event definition.
- Click Cancel to close the form.