Using the schedule report function
Smart Investigate includes a Data-Gadget that you can place on a user portal that allows that user to schedule and distribute reports at defined intervals. This feature of scheduling reports can be done from the Manager’s portal.
To schedule a report:
- Select Reports from left navigation pane.
- Login to system using [email protected] & the updated password.
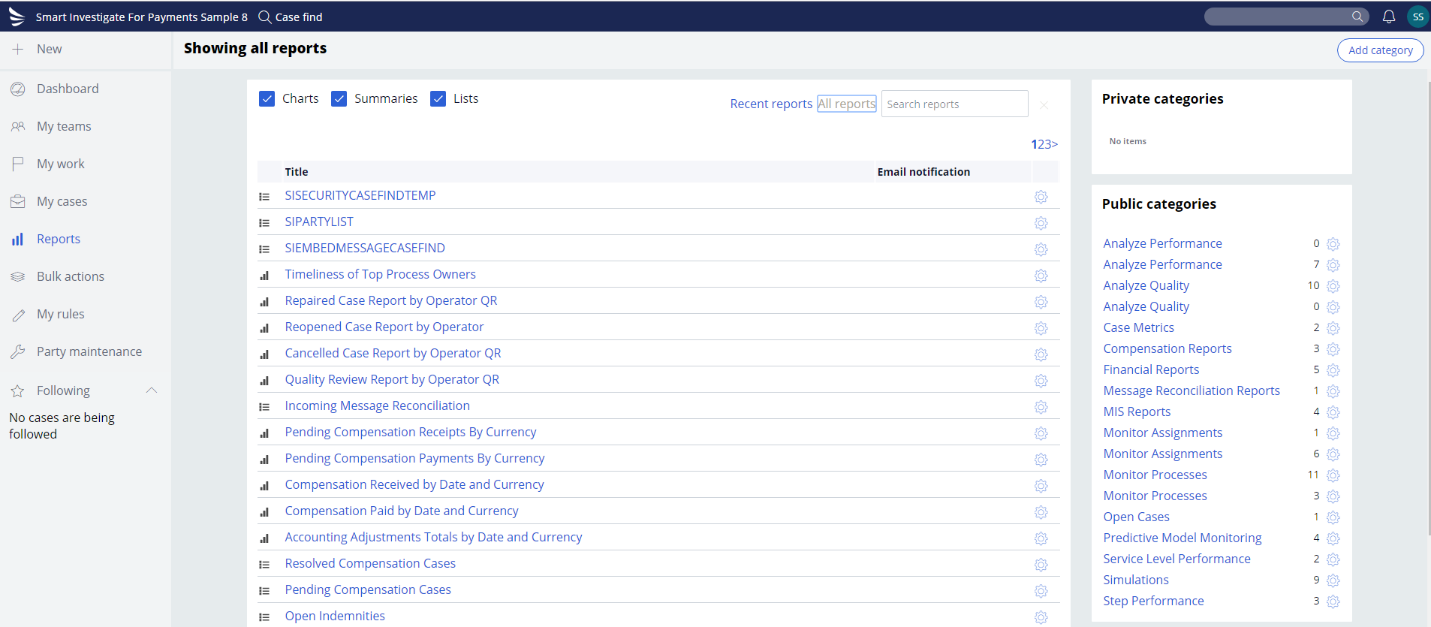
- Select the report from the report categories which need to be scheduled and
click the gear button next to it. Click Schedule.

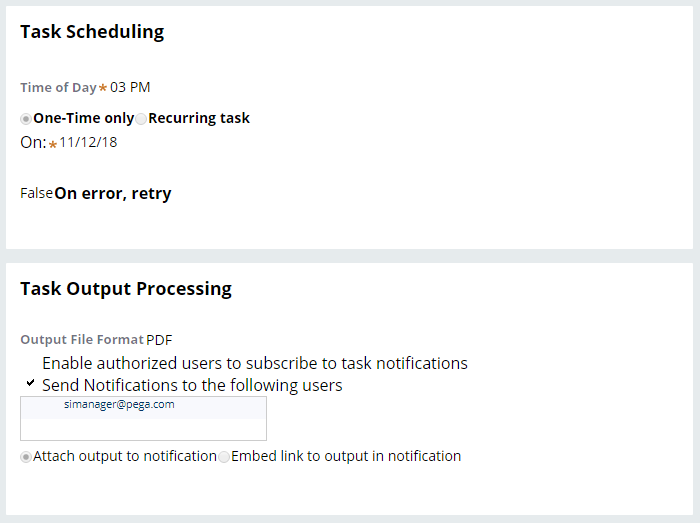
The New Schedule Report form appears in your workspace.
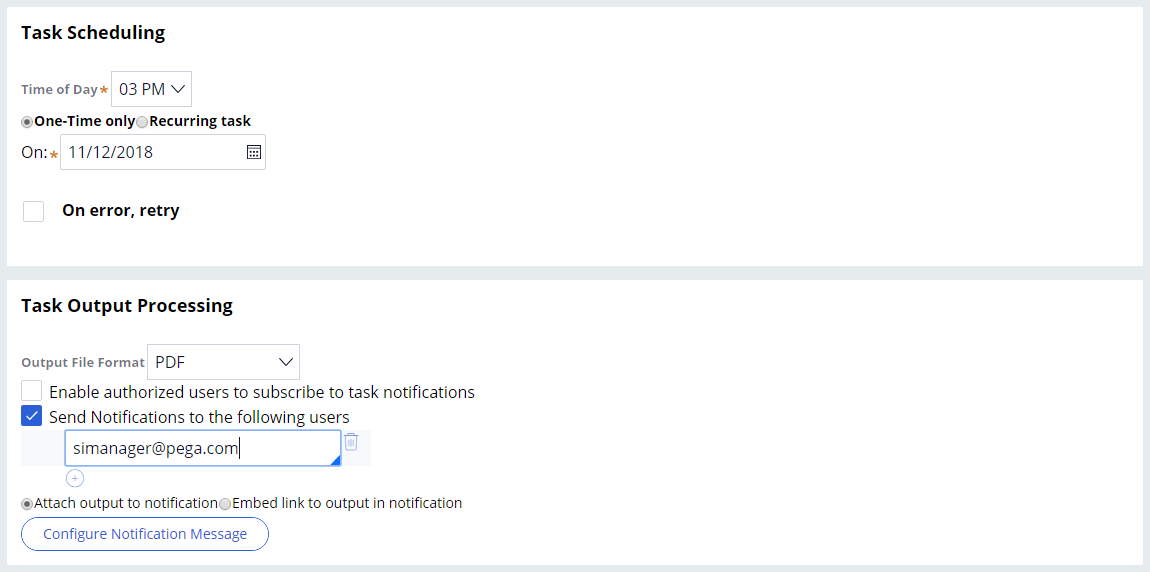
- Enter the following information.
- Enter the task schedule details.
- Enter the task Output Processing details
- Configure the Notification Message details
- Click Submit.
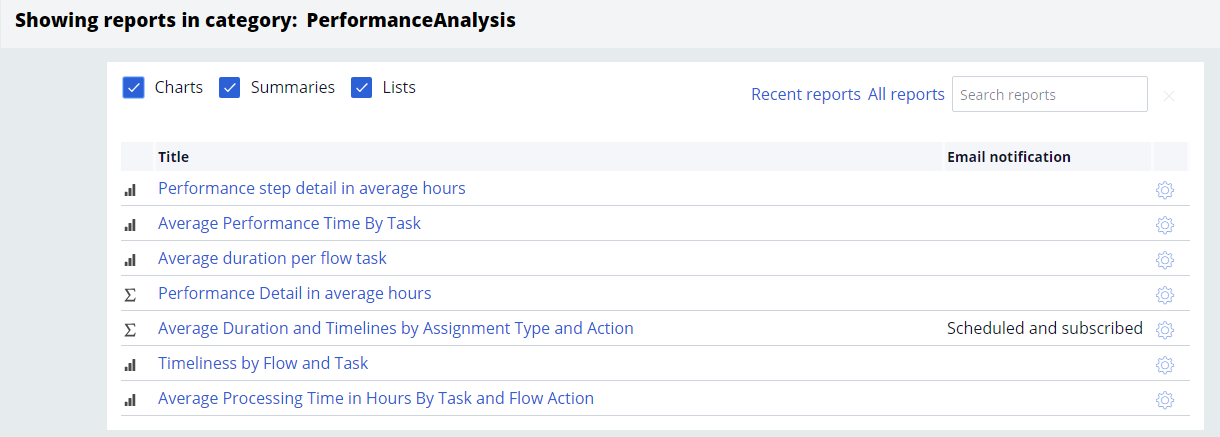
- For the scheduled report, the Email notification status would be updated to
Scheduled and Subscribed.
To cancel a scheduled report:
- Click on the gear icon and select the unsubscribe option.
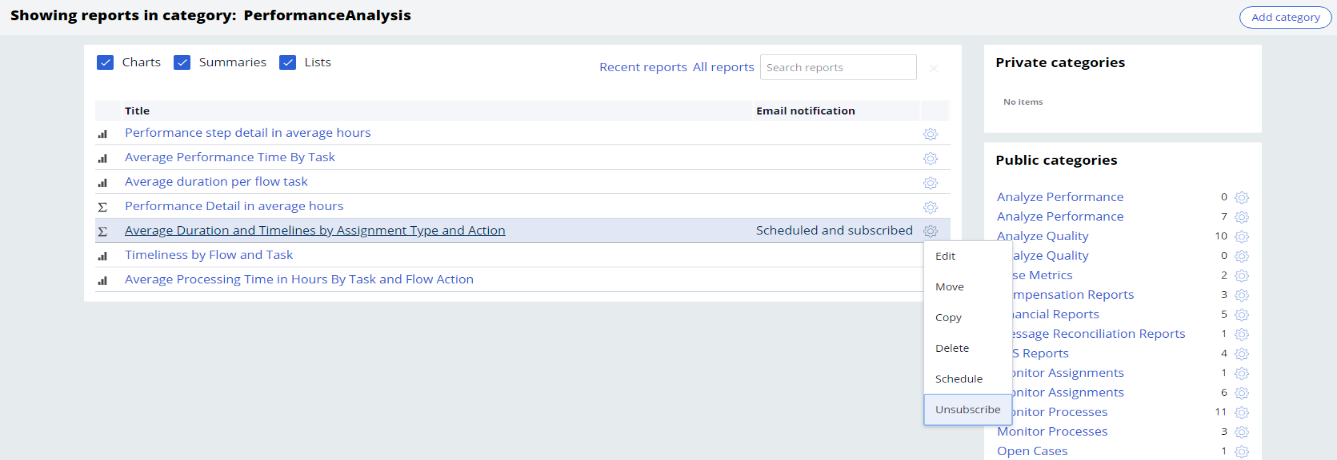
- The Unsubscribe Report form appears in your workspace.
- Click Unsubscribe.
Pega Smart Investigate for Payments
Implementation Guide
Previous topic Compensation reports Next topic Adding reports to the scheduler