 How to
implement "hover-and-see" worklists with SmartInfo
 How to
implement "hover-and-see" worklists with SmartInfo
How to
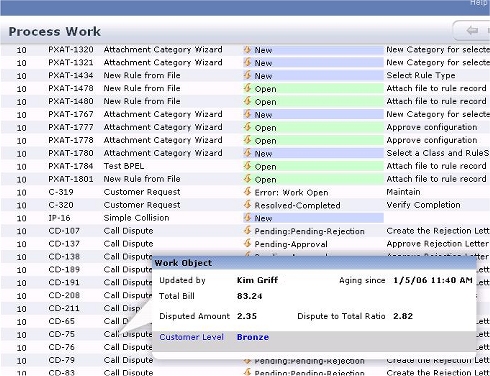
implement "hover-and-see" worklists with SmartInfo5.1Optionally, you can configure a worklist display to provide a preview of assignment or work object details in a pop-up window.

This feature uses the Smart Info Settings fields on the List View form. They reference a standard activity and a standard section rule. By overriding the section rule in your application, you can control which labels and fields appear in the pop-up window.
Standard rules |
Description |
| Assign-Worklist.WorklistDetail.ALL | See Pega Developer Network article PRKB-25223 How to customize the worklist display using a JOIN. |
| Data-Assignment-Summary.Worklist_PegaTask | For covered work objects. See Pega Developer Network article
|
| Data-Assignment-Summary.Worklist_CustomerRequest | For cover work objects. See Pega Developer Network article
|
 By default, SmartInfo pop-up
windows disappear after a few seconds, or when a user moves the mouse
pointer to anywhere outside the window. To add a close box to the Smart
Info pop-up window and have the pop-up window remain until explicitly
closed, include the standard section
@baseclass.SmartInfoClickable within your section. (This
standard section adds a close box but does not otherwise alter the
appearance of the section.)

|
SmartInfo, worklist |

|
About List View rules |