How To Create a Pega Cloud Instance
Follow the steps below to create a Pega Cloud instance.
- Open http://pcm.pegacloud.com/prweb.
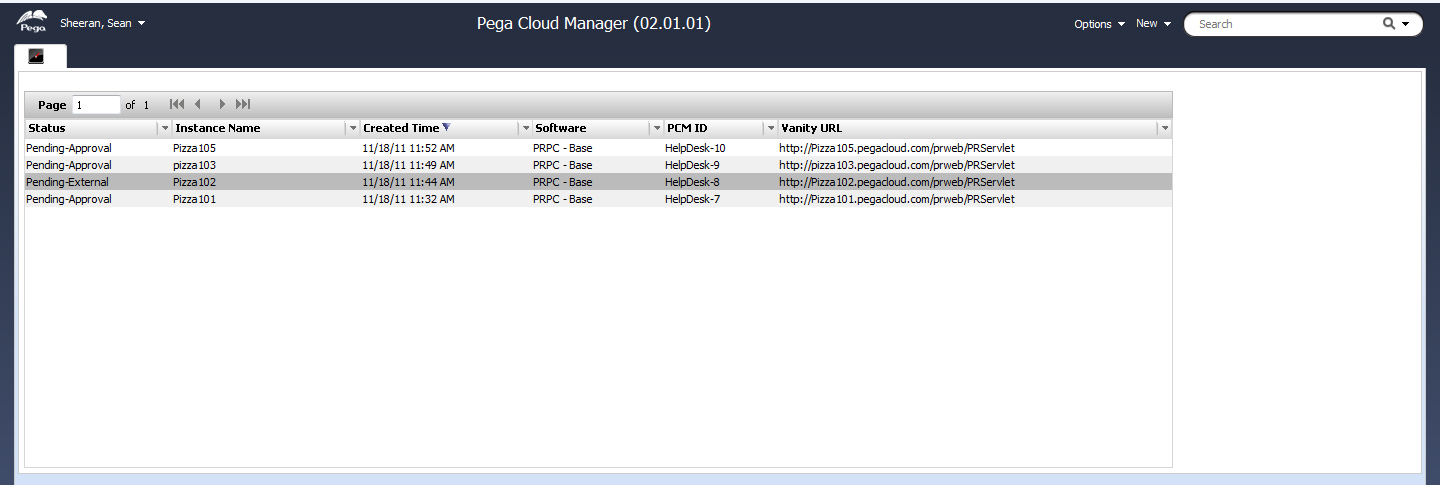
- Log on using your credentials. Depending upon your configuration, either a User Portal , Manager or approver portal displays (User portal shown below).
- Start a request by selecting in the New toggle list.

The following form displays: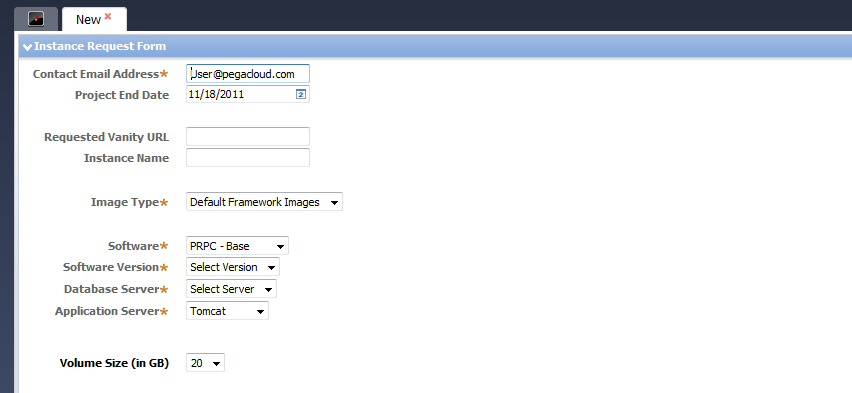
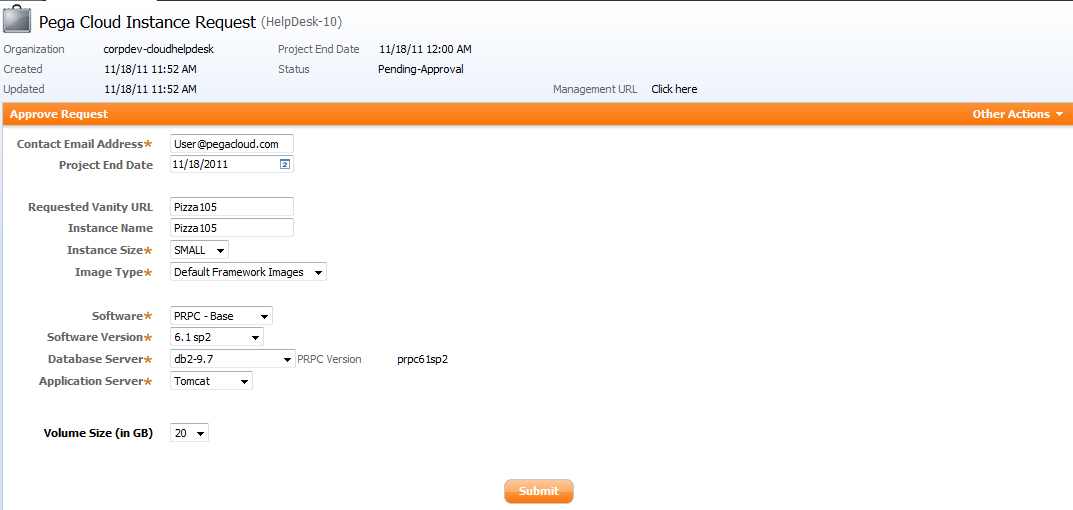
Use this form to define the request properties. - Enter values in the following fields (required are noted by * below):
- Contact Email Address*(person will be added as an Email contact for the instance. This does not need to be the current PCM request. The request is also include on all out bound email management)
- Project End Data - used as a reminder and auto awake of instance
- Requested Vanity URL – Requested Vanity URL record will default to work object ID if left blank. Also note that if the record already exist you will be asked to change this field
- Instance Name
- Image Type* – Drop down values Default Framework Images or Custom Images
- Software*
- Software Version*
- Database server*
- Application Server*
- Here is an example of a completed form:

- Click Create. A work object is created using the requestor’s organization prefix and is routed to the approver’s work basket for approval.

The system sends an email similar to the one below to the approving parties:
- The items Pending-Approval will appears on the approver’s portal under the Instance Pending Approval Header as shown in Figure A and B.
Figure A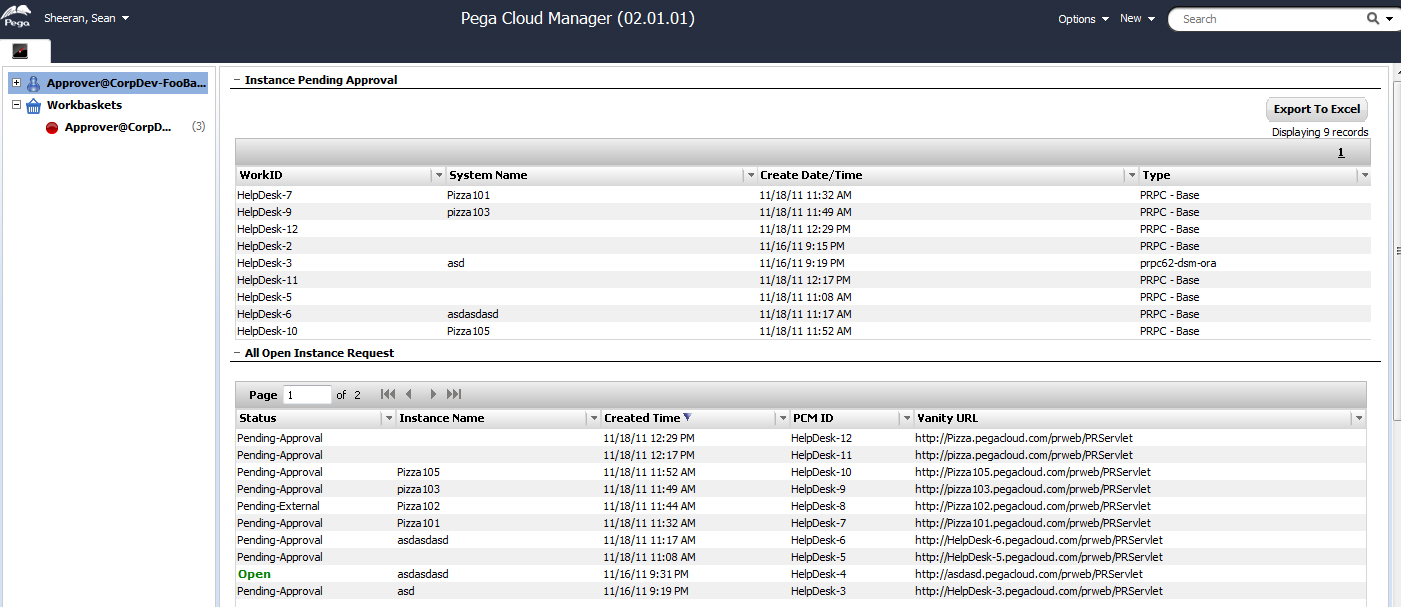
Figure B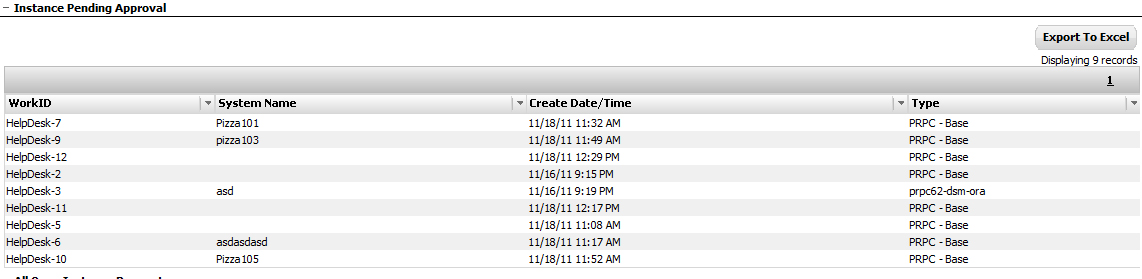
- Open the item. The request appears in a work form. The default action is Approve this selection. Approvers have the ability to update the request as needed along.
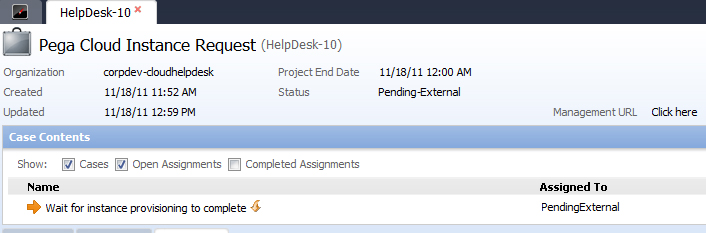
- Click Submit. The system initializes the creation process. The item's work status changes to Pending-External. The item is routed to the PegaAgent, which requests an instance from the cloud provider.
When processing is complete and the instance is running, an email is sent to the requestor and email contact, which contains the link to the new Pega Cloud instance. The requestor clicks the link to open the developer application. Along with a link to manage your Instance please see “Pega Cloud Instance Management Console” documentation to learn more around this topic.
The request appears on the manager's worklist with a status of Running. The Instance Information section on the request form is filled in as shown in this example: