|
|
Information on this tab describes the basic content and layout of the report. Complete the Columns To Include section at the top of the tab to define the columns to include, and how to format and display their values, and the Rows To Include section to describe which class instances or records to include.
 This tab can become wide if you include many columns on your report, since columns are displayed horizontally. To display more of the content, click the collapse arrow (
![]() ) in the portal to temporarily hide the navigation panel. When you finish working with this tab, click the expand arrow (
) in the portal to temporarily hide the navigation panel. When you finish working with this tab, click the expand arrow (![]() ) to display the navigation panel again.
) to display the navigation panel again.
This section defines the columns in the report. Grouping and group order are determined automatically.
Field |
Description |
| Column Name |
Instead of an existing single value, you can use the Function Builder to select a function template and provide database columns for it to operate on. The column in the report then displays the result of the SQL function. Process Commander includes an extensive set of SQL functions: see Atlas - Standard SQL function rules. If none of them exactly satisfy application requirements, you can create a custom SQL function template that can be selected in the Function Builder: see About Function Alias rules. To start the Function Builder, click the Function Builder icon (
|
| Column Heading |
Optional. Enter a column heading to be used for this column on the report. By default, the label defined for the selected property will appear as the Column Heading for the column. |
| Column Width |
Optional. Enter the desired column width for the column as a percentage of the window's width or in pixels. Enter an integer followed by either |
| Function |
Choose one of the built-in functions |
| Format Values |
|
| Sort Type |
Optional. For each sorted column, choose one of the following:
|
| Sort Order |
Optional. If you are sorting the values for more than one column on the report, enter a value for each sorted column which is an integer between 1 and the number of sorted columns. |
| Display Values Across Columns |
Optional. If this option is checked, values for the column will be displayed horizontally. Each value for the column will appear as a column on the report. Displaying one or more columns horizontally lets you create cross-tab and pivot table reports. |
| Hide |
Optional. If this option is checked, this column is not displayed on the report. This option lets you, for example, sort rows on a report based on a column that is not displayed. |
At the bottom of this section is the Enable Grouping checkbox. This allows you to group report data by one or more of the columns which have numbers in their Sort Order fields. When you check this option, a line of text and a number entry field appear to its right: "Display values in columns 1 - [1] as group headings." This allows you to select as many columns having sort order numbers as you wish. You selection must be something like 1- [3], not 1 - [2, 4]; that is, the selection must start with the first sort-order column and continue without skipping any sort-order column numbers.
The result of using this feature is that report data displays grouped by the specified columns' values, and the column names appear as the heading for each group.
This section defines filter conditions, tests which determine which rows qualify to appear in the report display. If you leave this section empty, the report selects all instances of the Applies To class (or instances or records of whatever sources are indicated on the Data Access tab) up to the limit in the Maximum Number of Rows to Retrieve field on the Data Access tab.
At the top of this section is a Remove Duplicate Rows checkbox. When this option is selected, the report discards duplicate row entries.
Each row of this array in this section identifies a filter condition. The order of rows in this array is not significant. Process Commander converts information in this array to an SQL WHERE clause when retrieving data from the database.
 If you define filter conditions in this section, you must enter a logical expression in the Conditions text box in the section header. Using the labels entered in the Conditions array, the logical expression defines how the system is to combine the conditions. The expression can include parentheses and the operators AND and OR. For example, if the table contains four rows labeled A, B, C, and D, you can enter an expression like (
A OR B OR C) AND D in this text box. The notation is the same as for the logic statement in When condition rules.
 You can specify only
 Single Value properties in the Column field. Each property you identify for selection criteria must be exposed as a column in the database table.
Field |
Description |
| Label |
|
| Column |
|
| Relationship |
Select a logical operator for the comparison condition, such as |
| Value |
If the Relationship field is set to IS NULL or IS NOT NULL, leave this field blank. Commas correspond to an OR test: if the Value field contains two or more entries separated by commas, the comparison is true at runtime if the value of the Column field equals (or is greater than, or is contained in, and so on) any one of the entries. When the Value field contains a When evaluating either of the two Condition values For guided assistance in completing this field, click the magnifying glass icon (
|
| Prompt Mode added on 3/17/2010 |
|
| Use Null, If Empty? |
For example, assume the criteria in a row is:
In situations where this default behavior is not desirable, select the Use Null* box to force the Condition value to become |
| Ignore Case - added on 3/17/2010 |
Select to have runtime comparisons of the Field value and the Value value be case-insensitive; that is. "Smith" matches "SMITH" and also matches "sMiTH". If selected, then at runtime " Clear to cause tests of the Field value and the Value value to occur without case conversion. In this case,
See Pega Developer Network article |

|
Working with the Report Viewer
Report Definition rules — Defining and Editing Charts Report Definition form — Completing the Chart Definition dialog |

|
Atlas — Standard Report Definition rules |
|
|
Filter |

 Report Definition form
 Choose a
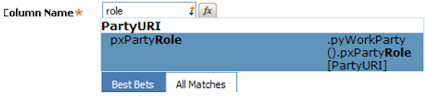
 ) to the right of the control value to enter parameters for the control rule.
 ) to open the control rule.
  Select a value to determine how a user of this report can modify the condition in this row when the report is run and displayed in the
 This box is important only when there is no value at runtime specified in the Value field. By default, when the Value field is empty at runtime, the criterion defined by this row is ignored; processing is the same as if this row is not present.
 In most cases, leave this box cleared. Select this box only when necessary to obtain the rows of the report:
 PRKB-25511 How to correct the Case Insensitive warning for list view rules.
 About Report Definition
rules
About Report Definition
rules