Migrating from Legacy Webchat to Web Messaging (Pega Customer Service)
Switch to the Pega Customer Service application's Digital Messaging interface from your existing Legacy Webchat interface if you want to use the new React-based Web Messaging widget.
Pega Customer Relationship Management for Insurance 8.6 Post-update Tasks for Pega Cloud services
Environments
- On the Security tab of the application definition in Dev
Studio, enter the Manager ID and the Manager
Key in the Digital Messaging security
section, and then click Save.
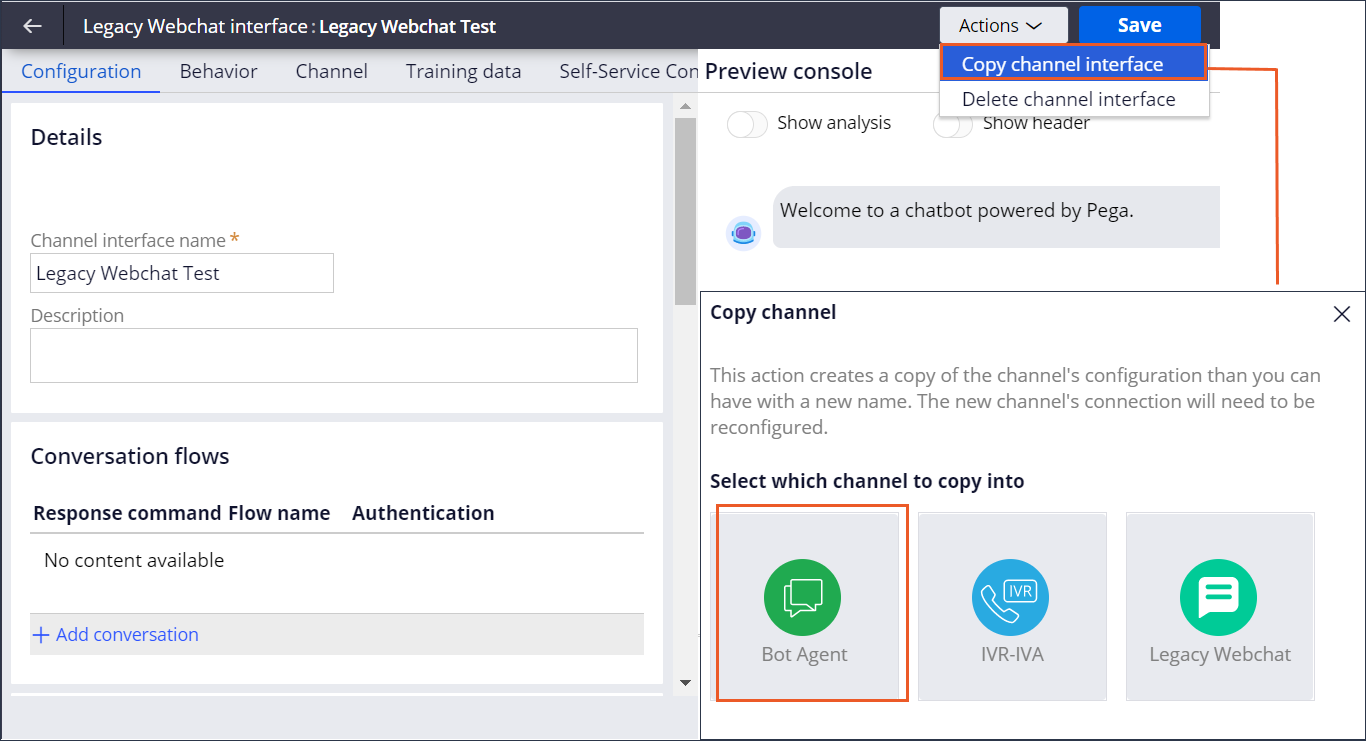
- Navigate to your Legacy Webchat interface.
- On the right side of the page, click .
- In the Copy channel pop-up window, click Bot
Agent to switch from your Legacy Webchat to the Digital
Messaging interface.
Switching from Legacy Webchat to Digital Messaging interface 
- On the Channel tab of your new Digital Messaging
interface, in the Set up section, enter Template
Operator and Base URL (URL for the
instance), and then click Save. The system displays the
Manage connections button.You can now add your connections to the different Digital Messaging channels through the Digital Messaging Manager.
- Click Manage connections to access the Digital Messaging Manager.
- In the Digital Messaging Manager, create a Web Messaging
connection and configure its appearance. To display a welcome message to customers when they open the widget for the first time, add the message in the Display Message field on the General tab of Web Messaging connection. The welcome message configured in the Behavior tab of the Digital Messaging interface will not apply.
- Deploy the Web Messaging widget on the client’s website pages by copying the code snippet on the Installation tab of your Web Messaging connection and using this snippet to replace the Legacy Webchat Mashup script.
Previous topic Adopting customer composites (Pega Customer Service) Next topic Checking your Pega Customer Service access roles for the required privilege
