Managing list values in Pega Sales Automation (8.2-8.4)
In Pega Sales Automation™ you can now manage the list values in your forms to align them with your business needs. Instead of displaying only the default values in each list or other Sales Automation objects, you can configure your own list by adding, modifying, or removing values. For example, edit departments, management levels, or industries. You can configure values without involving IT development teams as a Sales Ops operator in the Sales Ops portal or as an application administrator in App Studio.
Based on your business needs and your app implementation status, you can configure your lists in your production environment in the Sales Ops portal, or in your development environment as an administrator by logging in to App Studio.
Configuring lists in your environment
- Log in to your environment:
- To configure lists in your production environment, log in to the Sales Ops portal.
- To configure lists in your development environment log in to App Studio as an administrator.
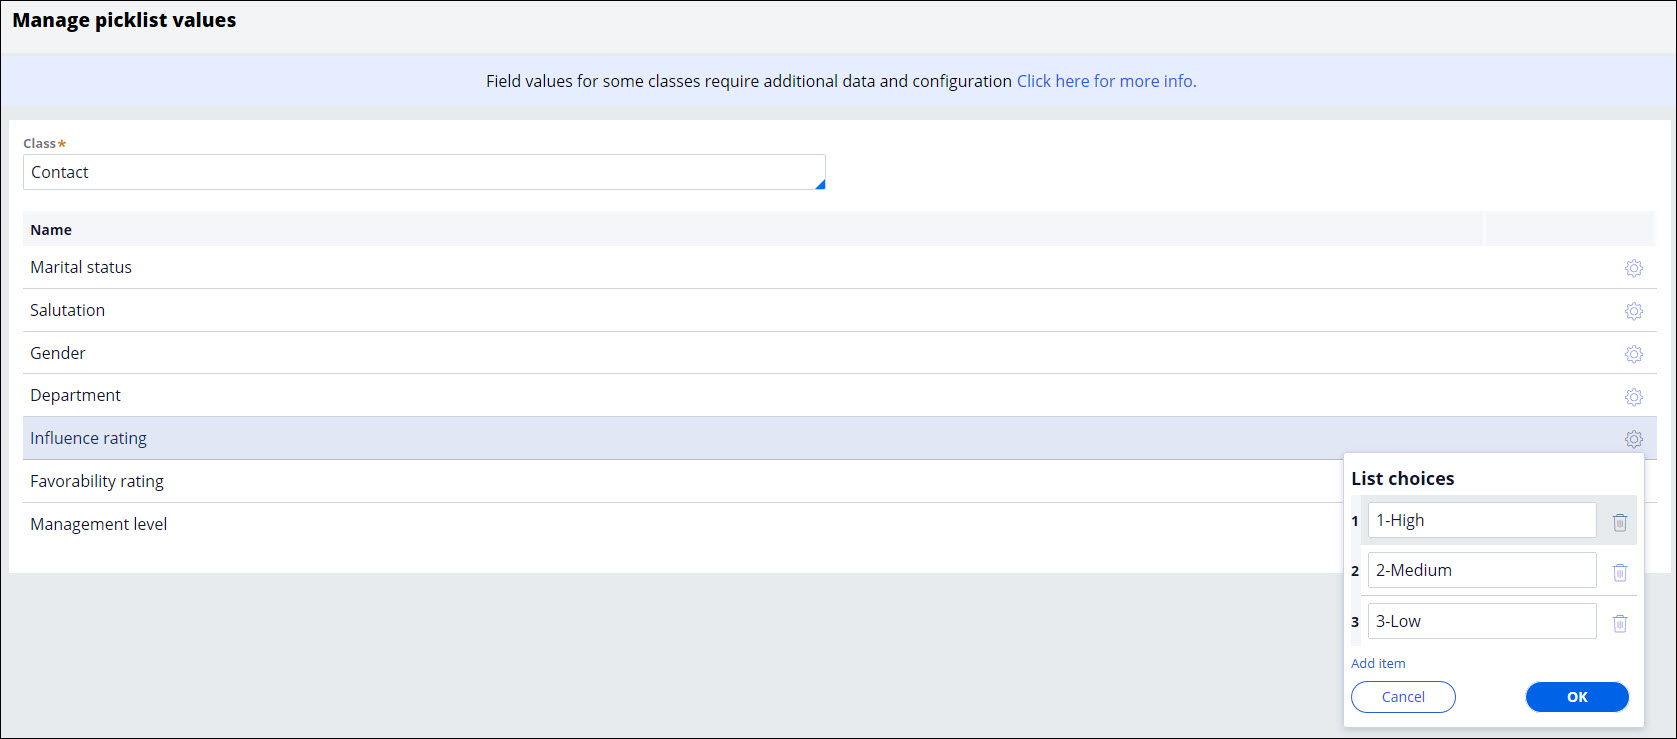
- In the navigation panel, click Tools > Picklist values.
- Enter the class name or press the Down Arrow key to select a class name, for example, Contact.
- Click the icon next to the property name that represents the list to modify the list entries.
For example, click the icon next to the Influence rating.

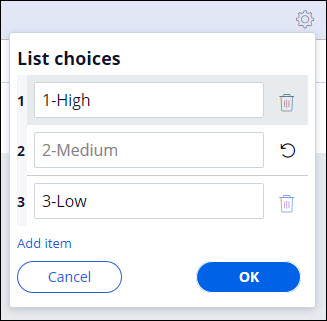
- In the List choices dial box, modify the list of values by adding, editing, or removing the picklist items.
For example, to remove the Medium rating from the list, select the value, and then click the icon.

- Click .
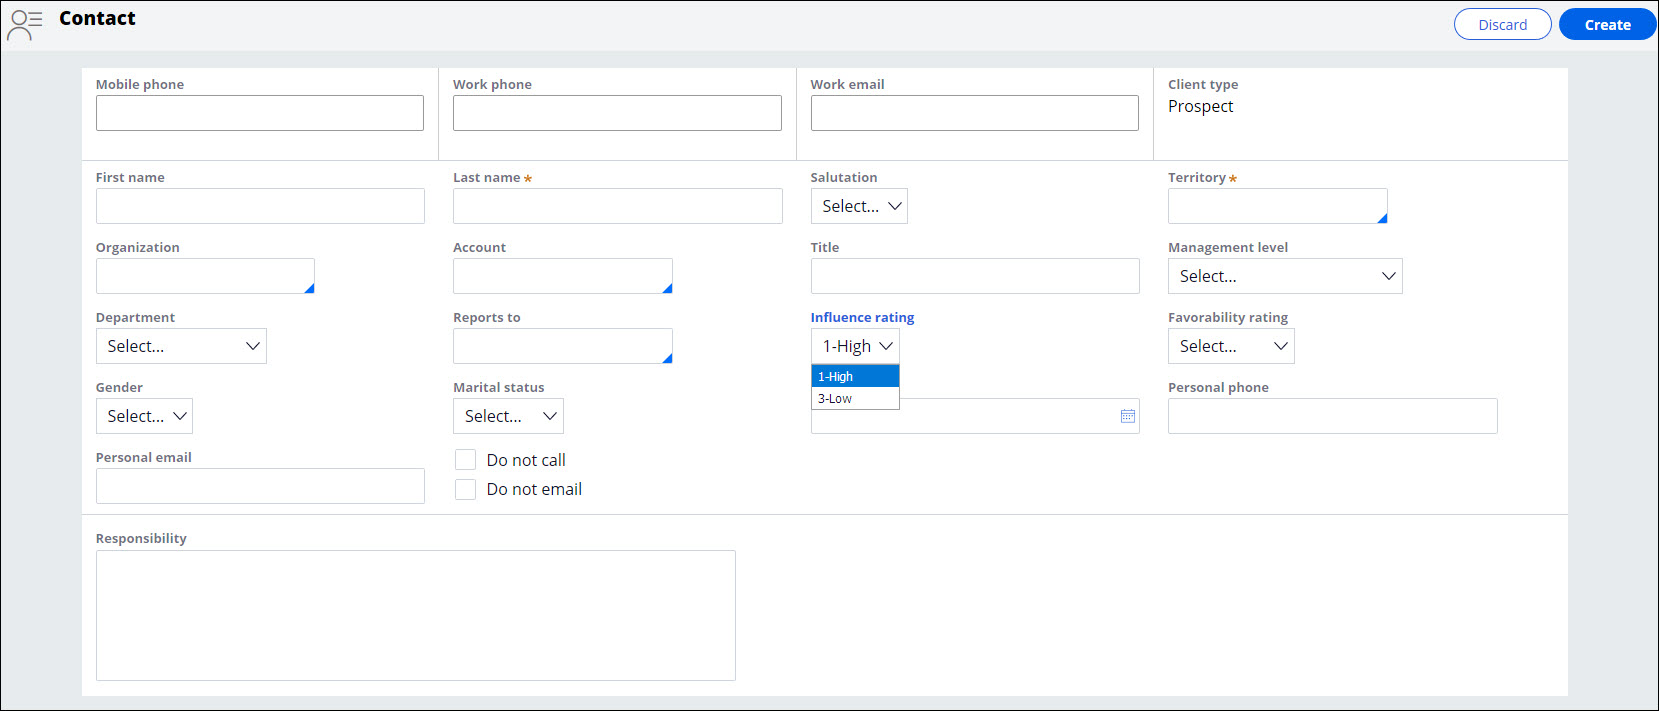
- Open your page and create or open a contact.
- In the Influence rating list, review the results. The Medium influence rating has been removed.

Previous topic Configuring LinkedIn integration in Pega Sales Automation (7.4-8.4) Next topic Pega Sales Automation report categories (8.2-8.5)
