Case report
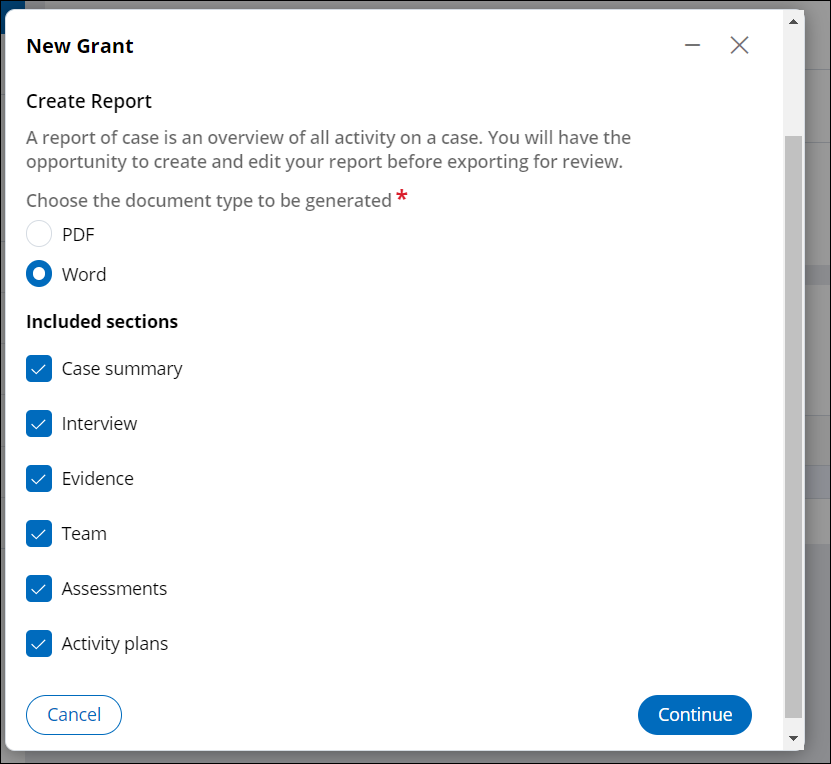
Case report is a reusable and generic component for a process. Using case report, a manager or reviewer can consolidate data from a case and can generate a Microsoft Word or PDF document.
You can add create report as a component from App Studio, and can generate a granular level report from case data. Pega Government Platform supports generating the details of case summary, interview, evidence, team members, assessments, and activity plans that are related to the case type. In addition to the above, the ICM application supports subjects as well.
Configuring case report in case designer
Configure the case report component in App Studio to use in a case type, as a step or an optional process, in a stage. You can use the case report component in case types that capture data related to interviews conducted, evidence, activity plans, and so on.
- Log in to Pega Government Platform as an administrator.
- In the header of your workspace, click the Switch Studio menu, and then click App Studio.
- In the navigation pane of App Studio, click Case types.
- In the Case types column, click a case type, or click the New button to create a new case type.
- In the Case life cycle section, click Stage, and then enter a name for the stage in the text box.
- Hover over Process, and then click .
- Click the Select button.
Adding new data to the generated report
Create a case report with case details attached to the case type. The case report component is useful if the case type captures data related to interviews conducted, evidence, activity plans, and so on.
- In the Dev Studio Explorer panel, click App.
- Click the Classes tab, and in the Search box, enter PegaPS-Work.
- Click .
- Click the data transform to open it.
- Click the Save as button to save the data transform to the required class.
- In the Data Transform Record Configuration section, in the Label box, enter a title.
- In the Context section, select an application.
- In the Apply to area, enter or select the required class.
- In the Add to ruleset area, select a ruleset and the ruleset version.
- In the Current work item section,enter or select a work item to associate.
- Click the Create and open button.
- Click the Add a row icon to add a new data transform to which you want to add data.
- In the newly added data transform, in the Target box, enter or select the .DocumentationReportproperty.
- In the Source box, append the required content in HTML format.
- Click Save.
Adding a new selection item to the report contents for list objects
Add a new case type component to the case report. During the document creation, the case type component and its details appear.
- In the Dev Studio Explorer panel, click App.
- Click the Classes tab, and in the Search box, enter PegaPS-Work.
- Click .
- Click the Save as button.
- In the Data Transform Record Configuration section, in the Label box, enter a title.
- In the Context section, select an application.
- In the Apply to area, enter or select a class.
- In the Add to ruleset area, select a ruleset and the ruleset version.
- In the Current work item section,enter or select a work item to associate.
- Click the Create and open button.
- Click the Add icon, and then click .
- Double-click the newly added check box.
- In the Cell Properties dialog box, enter the required details and then click Submit.
- Update the ShowItemsSelection (PegaPS-Work) When condition with the new property created above.
- Create a property in the PegaPS-Work class to hold the list of items for the user to select.
- Update the PreSelectItems (PegaPS-Work) data transform to set the details to list property.
- Update the SelectItems (PegaPS-Work) section to show the list of details for the user to select.
- Follow the steps mentioned in the Adding new data to the generated report section, to include the selected items in the generated report.
Using a Microsoft Word template
Create a new Word template while downloading the case report with details. The Word template helps in capturing key information and in maintaining consistency of the information.
- Click .
- In the Word Template Record Configuration section, in the Label box, enter a title.
- In the Context section, select an application.
- In the Apply to area, enter or select a class.
- In the Add to ruleset area, select a ruleset and the ruleset version.
- In the Current work item section,enter or select a work item to associate.
- Click the Create and open button.
- In the Template section, click Upload file to upload the required Word template, and then click Save.
- In the Dev Studio Explorer panel, click App.
- Click the Classes tab, and in the Search box, enter PegaPS-Work.
- Click .
- Click Save as to save the flow action into the case where you need a new template.
- In the Flow Action Record Configuration section, in the Label box, enter a title.
- In the Context section, select an application.
- In the Apply to area, enter or select a class.
- In the Add to ruleset area, select a ruleset and the ruleset version.
- In the Current work item section,enter or select a work item to associate.
- Click the Create and open button.
- Click the Action tab.
- In the Apply data transform box, enter or select PostPreview.
- In the Post-processing section, in the Parameters area, enter the new template name and the class.
- Click Save.
Changing the PDF file styling
Change the styles in PDF document. The <style> tag defines the style information (CSS), where you mention how case details render in the PDF document.
The following is the styling CSS for PDF document in PGP and is set in step 4 of the PostPreview (CL:PegaPS-Work) data transform.
"<style> th{ align:justify; text-align: left; vertical-align: top; border-bottom: 1px solid black; } table{ border-collapse:collapse; } th,td{ padding:2px; font-size: 9pt; } td{ border-bottom: 1px dotted #000; font-weight:regular; text-align:top; vertical-align:top; } </style>"- Save the PostPreview (CL:PegaPS-Work) data transform to the implementation layer.
- Update the new styling for the PDF document in step 4.
Previous topic Multiple entity intake Next topic Programs