Consent Agreement
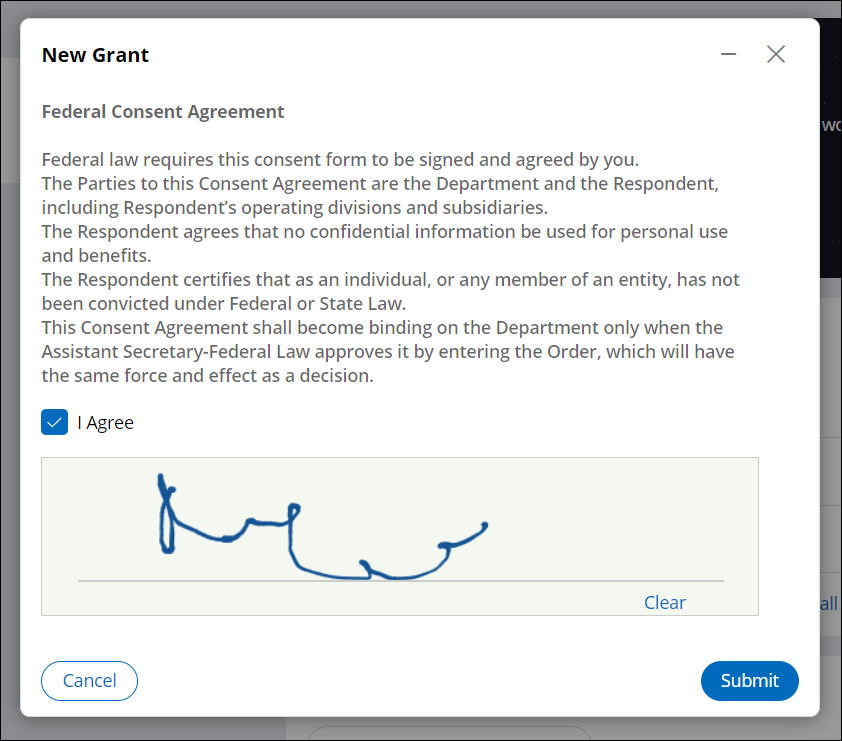
The Consent Agreement component displays an actionable consent agreement screen. The consent agreement screen contains the text stating the agreement clauses, a check box to agree, and a field to enter signature.
Government agencies can have various agreements, and terms and conditions that the constituents or the end users need to agree for various business use cases.
For example, for any contract award or for any grant application from the government, there must be an agreement between both the parties which is signed and agreed upon. The text and content must be different for different applications.

Configuring consent agreement in case designer
Use the Consent Agreement process component in a case type as a step in any of the stages. Consent Agreement is a built-in dynamic PGP component that allows e-signatures and templates.
- Log in to Pega Government Platform as an administrator.
- In the header of your workspace, click the Switch Studio menu, and then click App Studio.
- In the navigation pane of App Studio, click Case types.
- From the Case types column, click a case type, or click the New button to create a new case type.
- In the Case life cycle section, click Stage, and then enter a name in the text box.
- Hover over process, and then click .
- Click the Select button.
- In the Consent agreement details section, in the
Source list, select a source.
- Select By name, and in the Consent agreement template list, select an agreement type.
- Alternatively, select By property to specify a property on the work class that supplies the specific agreement type at run-time.
- Select the Is e-signature required? check box to include an e-signature.
- In the Routing details area, select
an operator:
- To route the assignment to the current operator, click Current operator.
- To specify a user or operator to whom you want to route this assignment, click Specific user, and then, in the User field, select a user or enter a property in the work class that supplies a specific operator ID at run time.
- To route the assignment to a specific work queue, click Work queue, and then, in the Queue field, select a work queue name or enter a property in the work class that supplies a specific work queue at run time.
- Click Save.
Extending consent agreement
Extend the Consent Agreement feature to add additional templates or edit the existing template text.
- In the navigation panel of Dev Studio, click
- Click .
- Click the filter for Property Name, and then search for ConsentAgreementTemplate.
- Click the property.
- In the Display and validation section, in the Prompt values area, create a new paragraph rule by clicking the Add a row icon.
- In the Standard value box, enter a value, for example, CentralAgreementTemplate.
- In the Prompt value box, enter or select the desired value.
- Click Save.
- In the navigation panel of Dev Studio, click
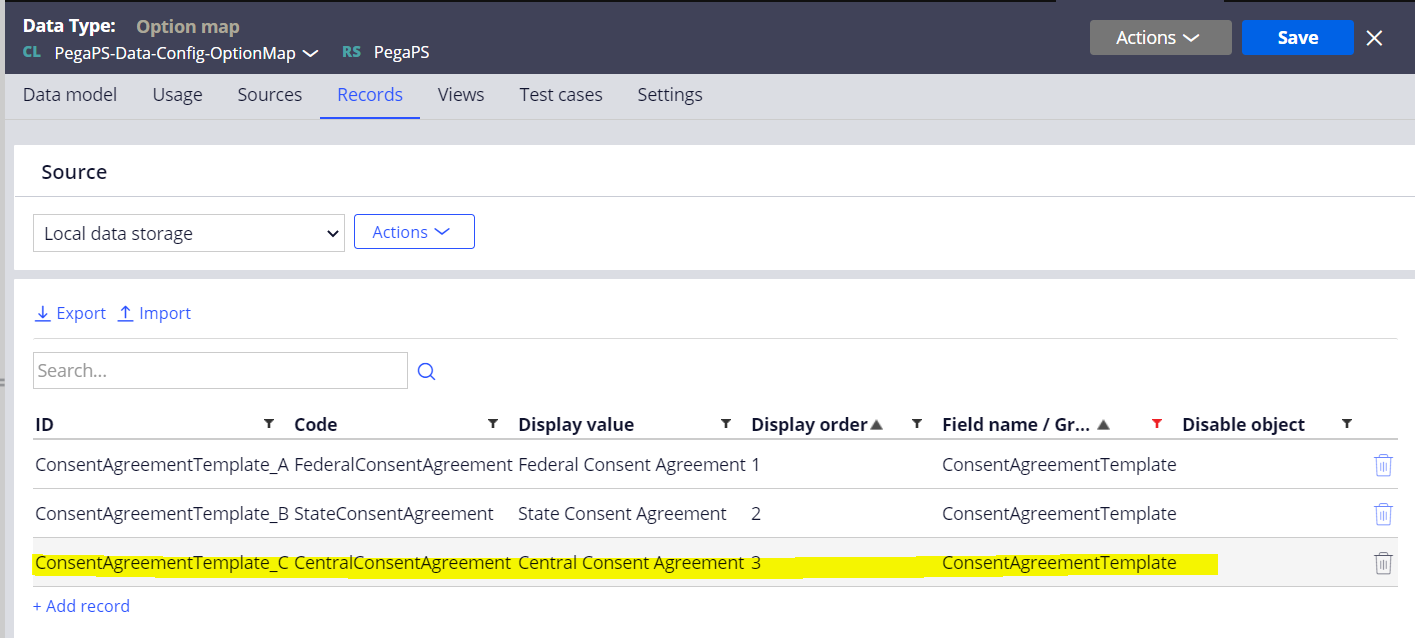
- Click Option map.
- On the Records tab, click Add record.
- Enter the appropriate text for the ID,
Code, Display value,
Display order, and Field name / Group
fields.
Figure: Adding a new consent agreement template 
- Click Save.
Previous topic Review Checklist Next topic Document intake
