Enabling offline conversions
To enable offline conversions, you must configure relevant settings in Paid Media Manager and in the destination platform.
To automatically push live offline conversion data to Facebook Ads whenever a conversion is captured through the Capture Response REST service, do the following steps:
- In App Studio, click .
- In the Paid Media section, edit or create a destination.For more information, see Configuring Pega Customer Decision Hub to enable synchronization with paid destinations.
- Select Upload offline conversion events to
destination.

- Click Submit.
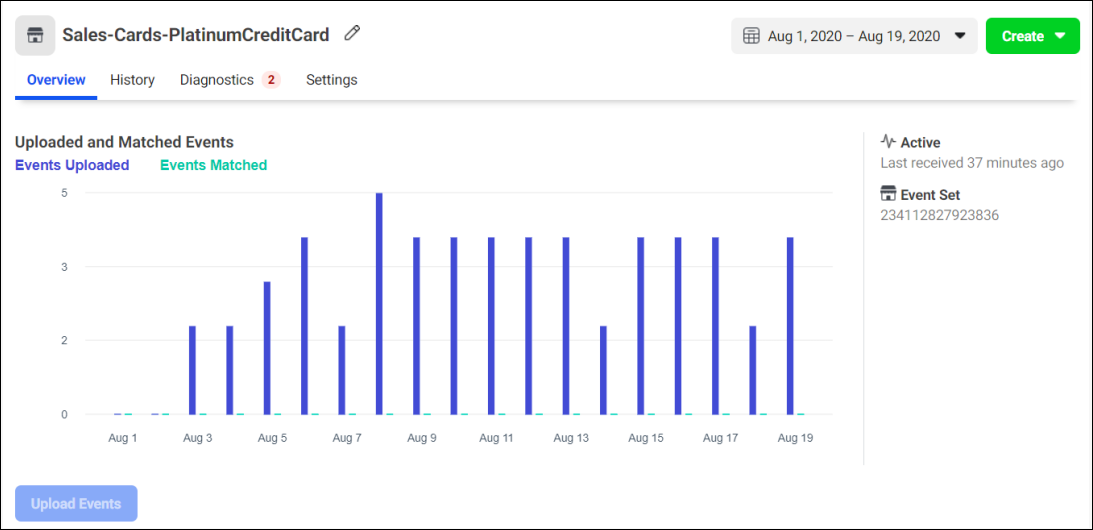
If no offline even set existed in Facebook Business Manager, the synchronization creates it with the following naming convention: <Issue-Group-Offer>, for example, Sales-Cards-PlatinumCreditCard.
You can now use the conversion data for use cases such as attribution reporting, bid optimization, and lookalike audiences. For more information, see Optimizing return on ad spend with the Conversion Bid Optimization tactic.
If you want to synchronize the conversion data with an offline event set that you previously created in Facebook Business Manager, make sure that the name of the event set has the format <Issue-Group-Offer>.
In addition to sending data about new interactions to Facebook Ads, you can also manually trigger a synchronization of historical data, previously collected by the CaptureResponse service for a specific time period.
For example, if you are starting to implement the offline conversions functionality, and you have already implemented a CaptureResponse pixel on your website, you can do a one-time synchronization that will send the captured data to Facebook.
- In App Studio, click .
- In the Historical conversions section, select Push historical conversions.
- In the Look-back window, select the time frame for historical conversion data.
- Click Run to send the conversion data to
Facebook Ads.
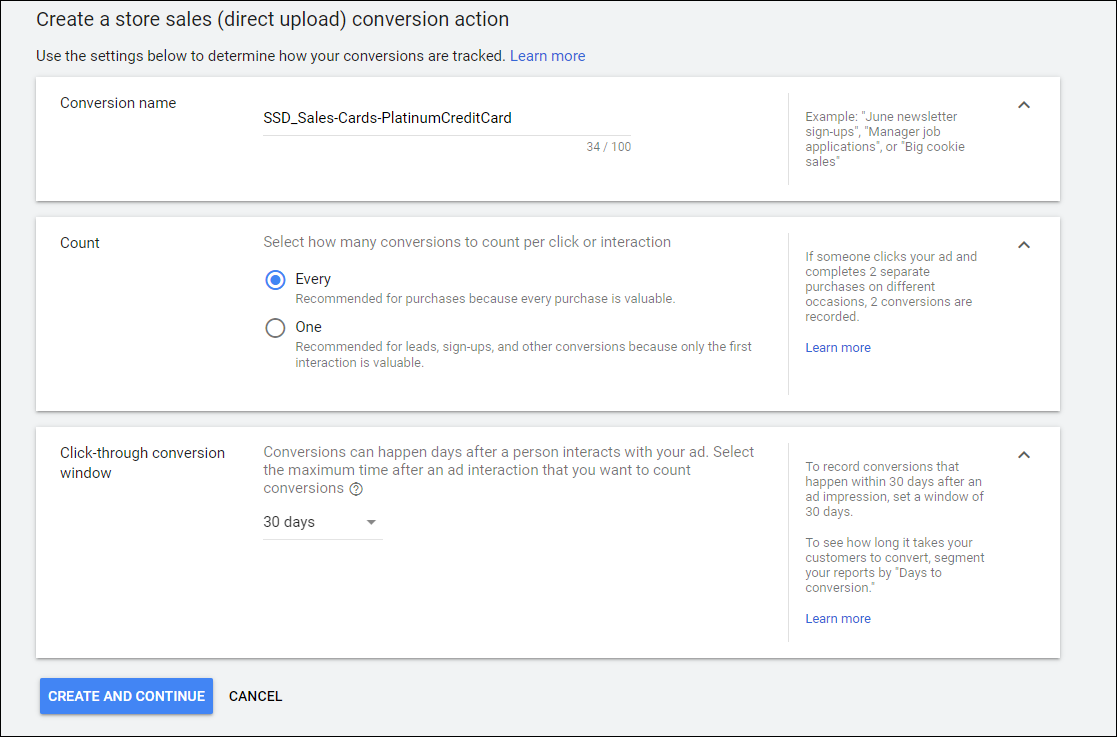
To automatically push live offline conversion data to Google Ads whenever a conversion is captured through the Capture Response REST service, you must first configure a conversion action in Google Ads, then enable the offline conversion push in Next-Best-Action Designer.
- Log in to your Google Ads account.
- Select an account that has SSD transactions enabled.
- Click .
- Select the type of conversion, for example, Store
Sales.

- 5. Fill out the action details. The action name must have the format
SSD_<Issue-Group-Offer>.For more information, see What are conversion action sets?.
- Click Create and Continue.
- In App Studio, click .
- In the Paid Media section, edit or create a destination.For more information, see Configuring Pega Customer Decision Hub to enable synchronization with paid destinations.
- Select Upload offline conversion events to destination.
- Click Submit.
During the next synchronization for this destination, metrics related to action acceptance are uploaded to a conversion action created in Google Ads. To view the metrics, create a custom column to show the aggregated value of conversions, as shown in the following figure:

You can now use the conversion data for use cases such as attribution reporting, bid optimization, and lookalike audiences. For more information, see Optimizing return on ad spend with the Conversion Bid Optimization tactic.
Previous topic Optimizing return on ad spend with the Conversion Bid Optimization tactic Next topic Reducing wasted ad spend with the NBA Known Targeting tactic