Use Paid Media Manager to target individuals on paid channels based on your
enterprise data and decisions.
Pega Customer Decision Hub Paid Media Manager User Guide
Pega Customer Decision Hub Paid Media Manager User Guide
Pega Customer Decision Hub Paid Media Manager User Guide
Pega Customer Decision Hub Paid Media Manager User Guide
With the traditional approach to web marketing, if an individual views information on
a product (for example, a Samsung Galaxy mobile handset), they will likely be
targeted with advertisements for that product for days, weeks, or even months after.
The company selling the product will leverage pixel-based APIs from various ad
platforms to retarget the individual based solely on this one interaction.
With Paid Media Manager, you can improve the targeting by leveraging the full
fidelity of enterprise data and intelligence to determine which ads to target the
individual with, and at what priority. Instead of relying just on the last web
interaction, Paid Media Manager communicates the individual's next best action,
considering that interaction as well as data about previous interactions to
determine how to target individuals with ads.
The Paid Web Service can be used with any ad platform pixels, including those from
Twitter Ads, Amazon Advertising, and The Trade Desk.
Considerations for using pixel-based
APIs
When implementing pixel-based APIs, keep in mind the following
considerations:
Unlike people-based APIs that rely on hashed Personally Identifiable Information
(PII), such as an email address or phone number, pixel-based APIs rely on a web
cookie. As a result, this targeting mechanism requires an individual to be in a
live web session to call a pixel. Because the ability to call cookies from a
third-party server (a.k.a third party cookies) is increasingly restricted in
modern web browsers, the third-party server may sometimes be unable to identify
the individual.
Pixel-based audiences cannot be updated. This means that once an individual is
added to a pixel-based audience, they cannot be removed from it and may still
see the same ad even after they accept or reject the action, until the
individual's audience membership expires. Make sure to set an appropriate
expiration these web audiences based on Next-Best-Action.
As a best practice, use people-based APIs in conjunction with pixel-based APIs
to maximize the opportunities to target individuals with ads based on their
Next-Best-Action.
Below are specific instructions on how you can implement the Paid Web Service to
generate Next-Best-Action audiences on Facebook Ads and Google Ads:
Sample Javascript to send Next-Best-Actions to the advertising pixel
Use Paid Media Manager to target individuals on paid channels based on your
enterprise data and decisions.
As part of implementing pixel-based APIs on your website, you must configure an
advertising pixel which will trigger when an individual does specific actions on
your website. To help you configure the pixel for Next-Best-Actions, you can refer
to the following sample Javascript: Sample Paid Web Service Pixel Call for Facebook
Ads and Google Ads. The sample contains examples of Facebook- and
Google-specific code that you can reference in your own implementation.
Using a Facebook Pixel to create action-based audiences in Facebook Ads
This tutorial describes how to customize a Facebook Pixel to include the information
required by the Paid Web Service, and how to convert a Facebook event into a people-based
audience.
Make sure to include the following line in the
<script> section of the pixel code:fbq('trackCustom',’AudienceName’);
The value of the AudienceName parameter is
provided by the PaidAudiencesContainer REST service.
This service returns a list of all paid audiences to which an individual
belongs, that is, the latest actions selected for the individual by the
Next-Best-Action strategy. For more information about the
PaidAudiencesContainer REST service and its
parameters, see Understanding the PaidAudiencesContainer REST service.
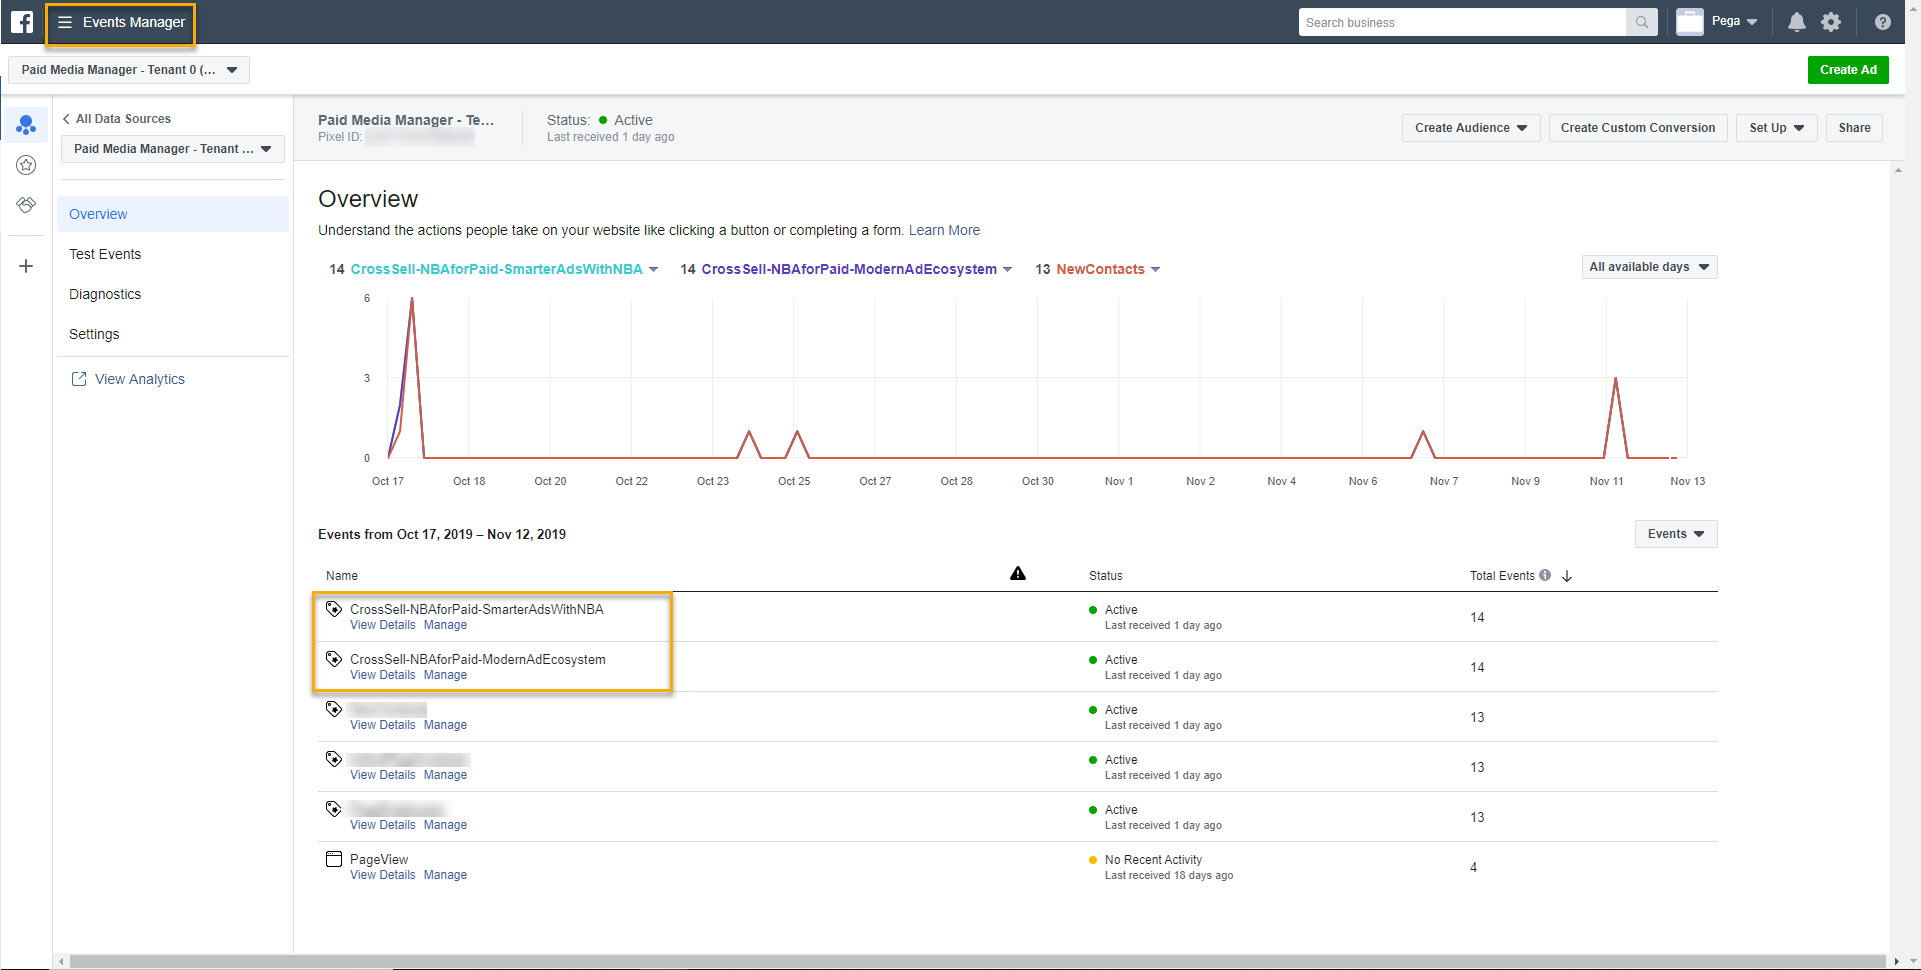
Install the Facebook pixel on your website.
To verify that the pixel is correctly configured, generate some website
traffic, and then log in to Facebook Events Manager, as in the following
figure:
Sample events created with data provided by Next-Best-Action
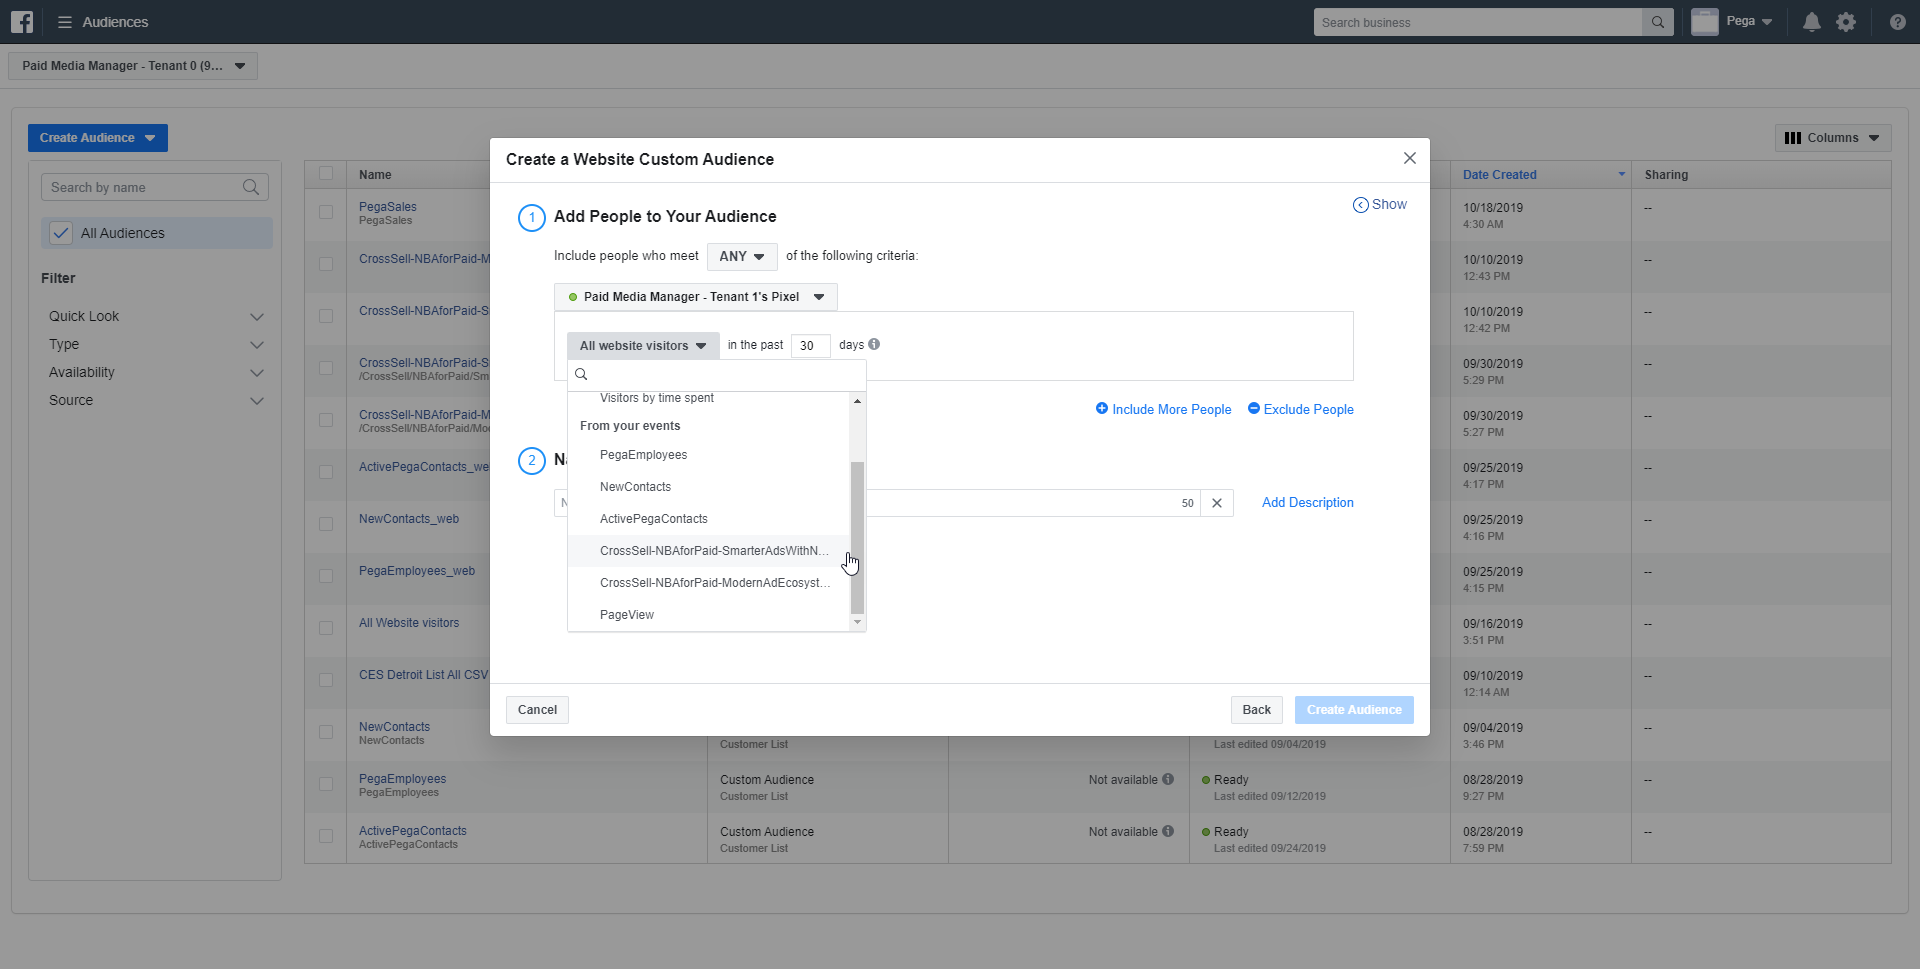
In the Add people to your audience section,
select your custom event, as in the following figure:
Creating an audience from event data provided by
Next-Best-Action
Save the audience and use it in your Facebook campaigns.
Result: The Facebook Pixel is now installed on your website and
ready to gather information about visitor activity on your website, enriched with data
about Next-Best-Actions selected for them by Pega Customer Decision Hub. If you
want to implement a Google Ads pixel, see Generating Next-Best-Action web audiences with Paid Media Manager.
Using Event Tracking to create action-based audiences in Google Ads
This tutorial describes how to customize a Google Analytics Event to include the
information required by the Paid Web Service, and how to convert an Event into a
people-based audience.
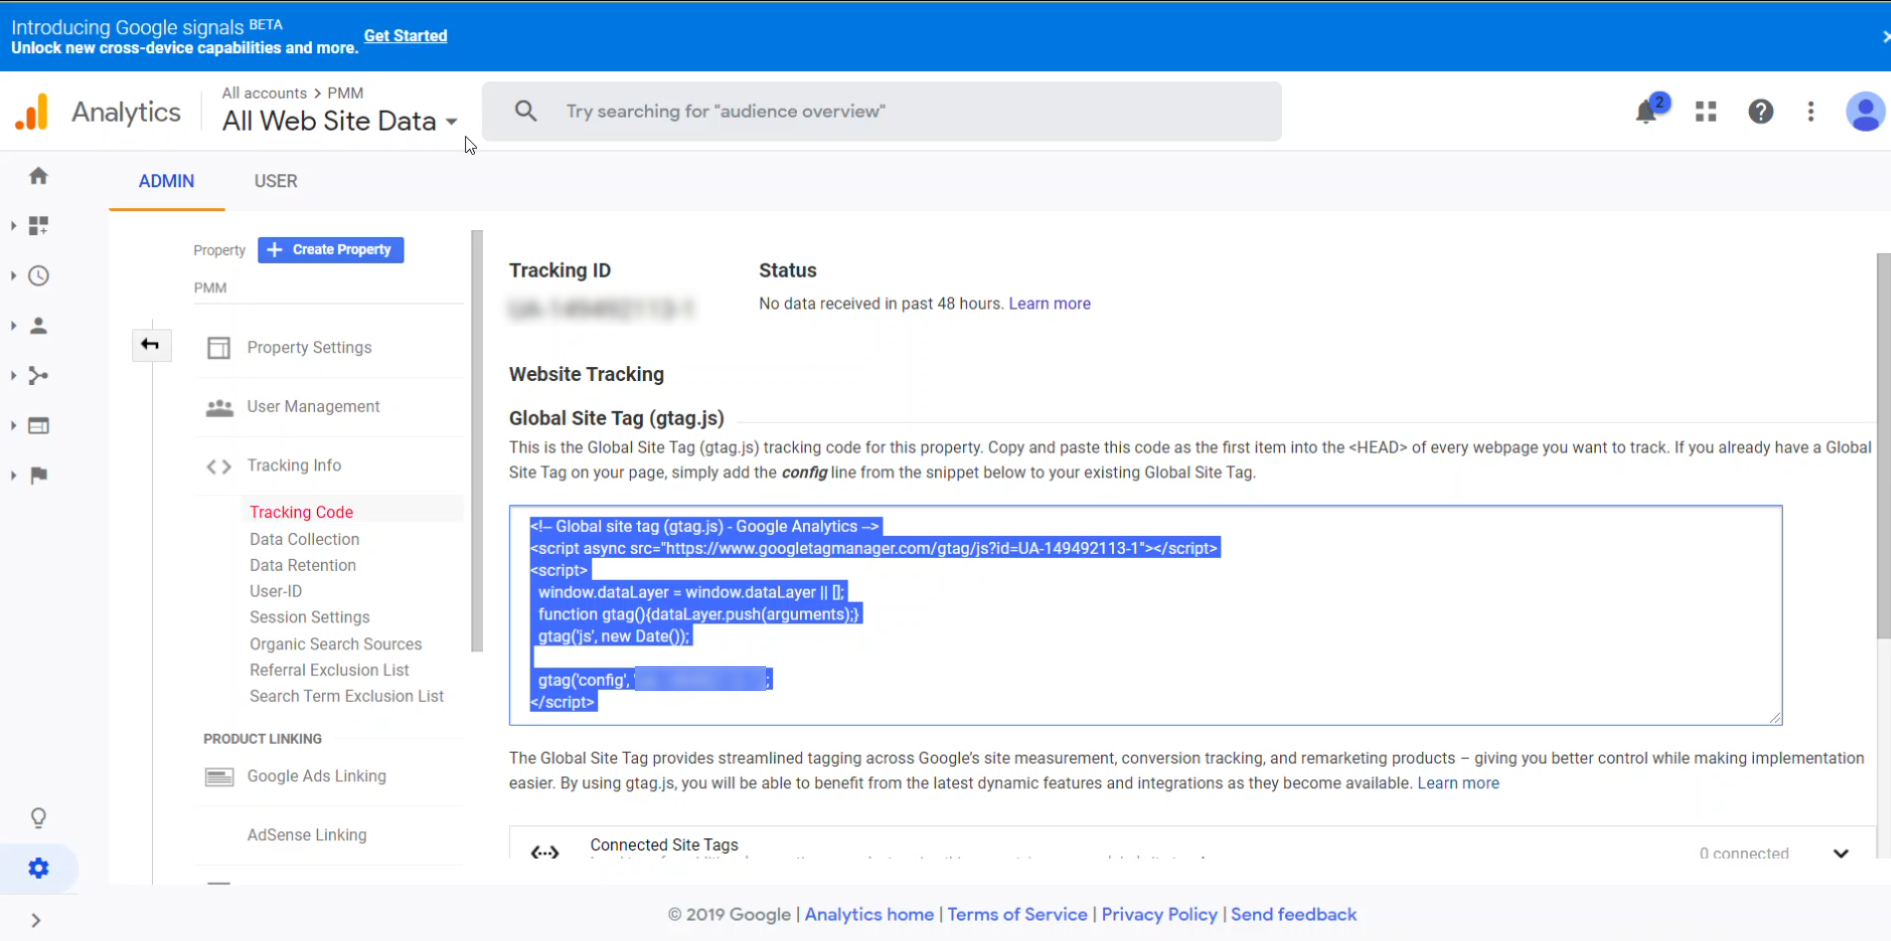
Make sure to include the following line in the
<script> section of the pixel code:<script>gtag('js', new Date());gtag('config', '<your global site tag tracking
code>');// In the Admin panel, click Tracking Info > Tracking
Code and take note of the ID in the Tracking ID
field.gtag('event', '<your event action>', { // event
action could be Page View, click, download etc. 'send_to':
'<your global site tag tracking code>','event_category': '<event
category>','event_label': '<event label>'});</script>
The value of the <Event Label> parameter
is provided by the PaidAudiencesContainer REST service.
This service returns a list of all paid audiences to which an individual
belongs, that is, the latest actions selected for the individual by the
Next-Best-Action strategy. For more information about the
PaidAudiencesContainer REST service and its
parameters, see Understanding the PaidAudiencesContainer REST service.
To verify that the pixel is correctly configured, generate some website
traffic, and then log in to Google Analytics and click RealtimeEvents.
Note: There might be a delay of several minutes before the events are
created.
To use the Event data in your targeting, convert the events to Google Ads
audiences:
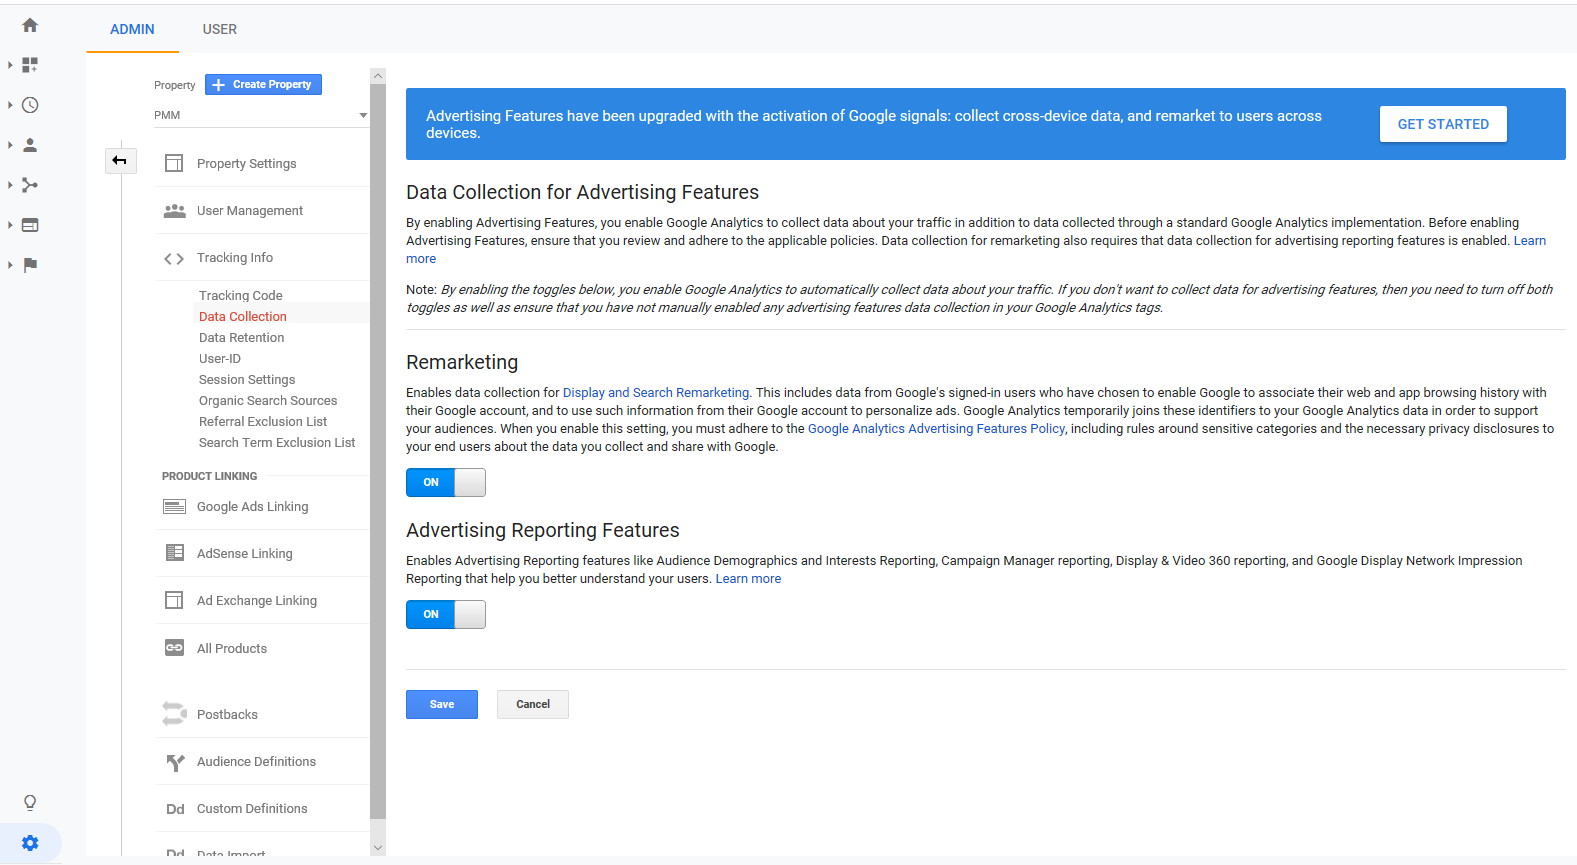
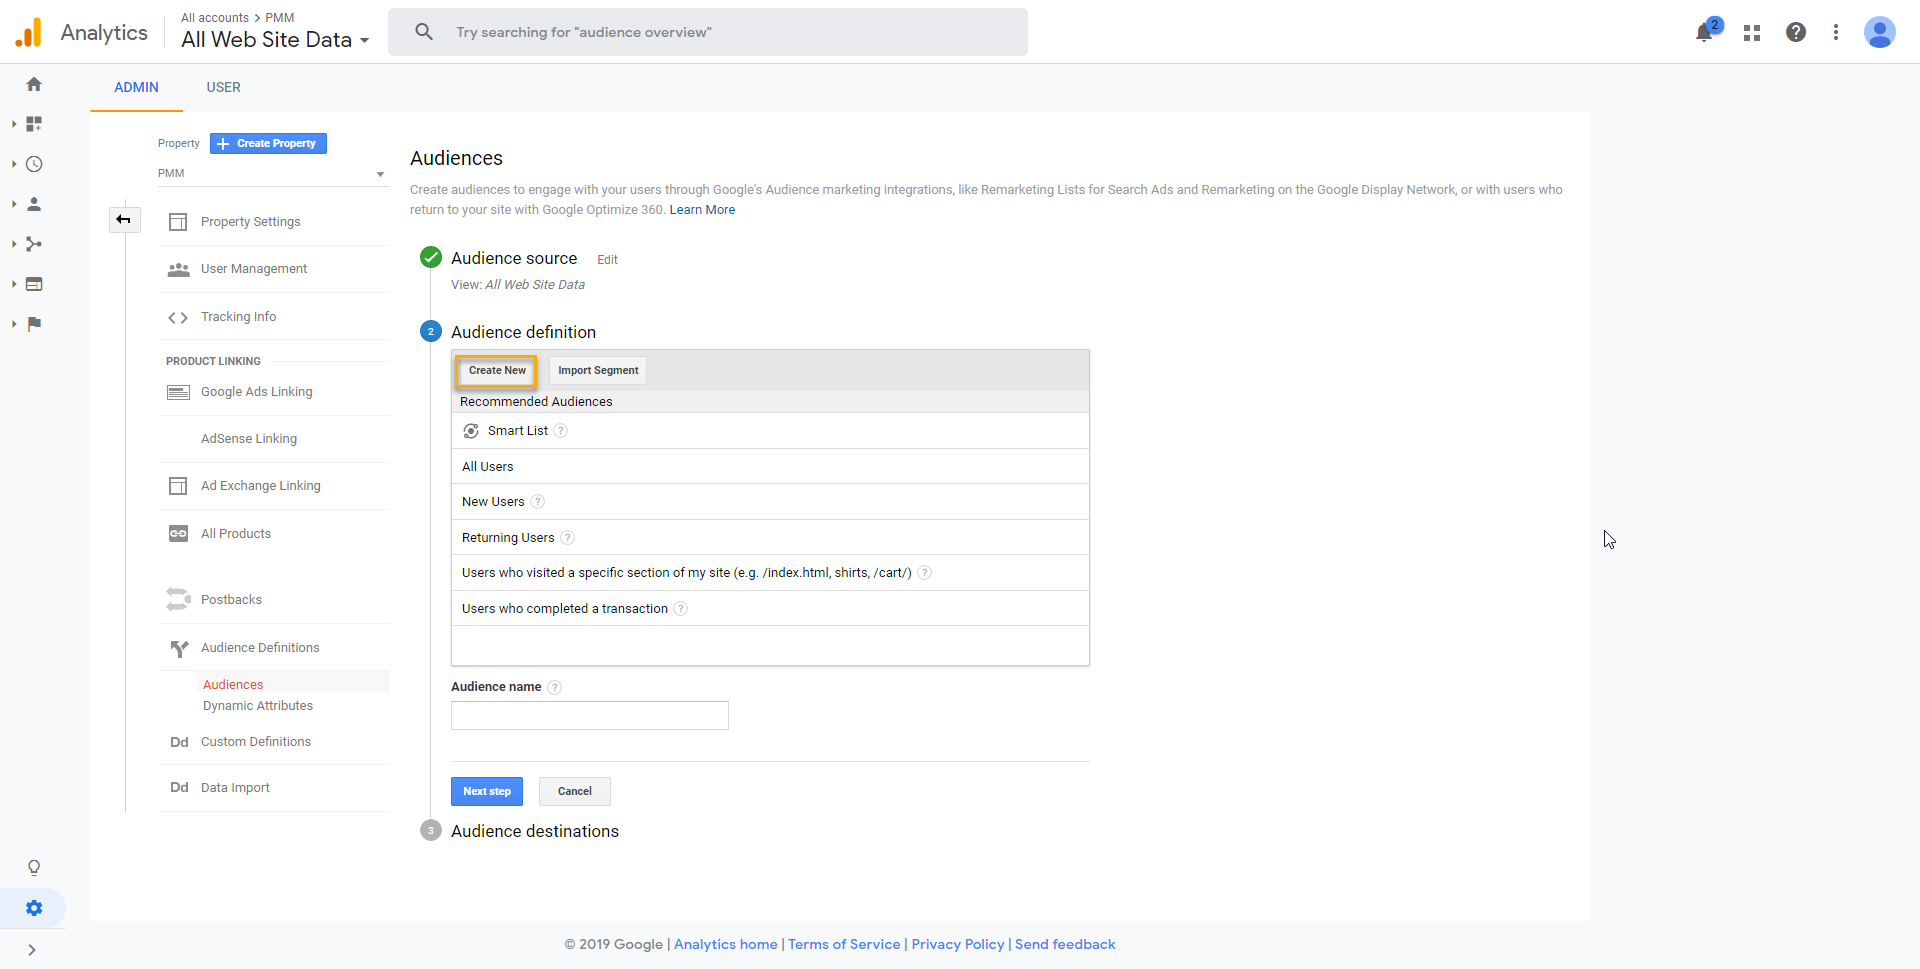
In the Admin panel of Google Analytics, click Audience DefinitionsAudiences.
Click New AudienceCreate New.
Create a new audience in Google Analytics
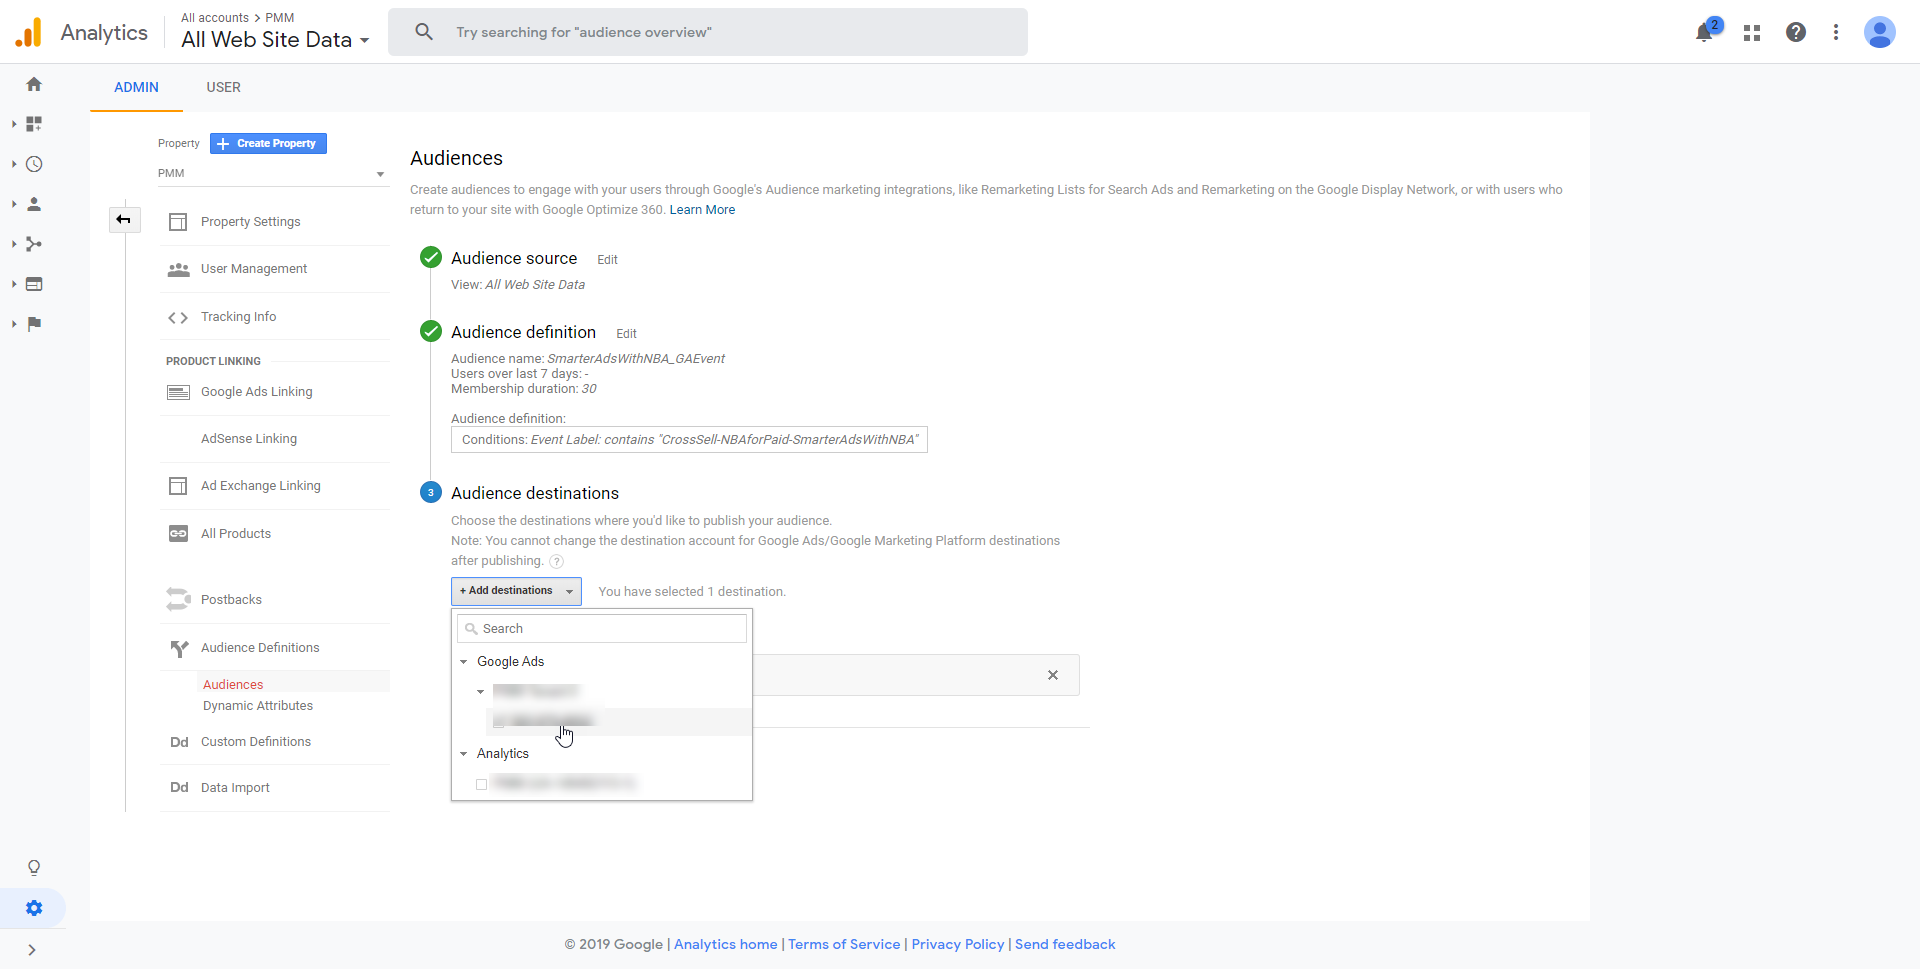
Click Conditions and select your custom Google
Analytics Event by its Event Label, that is, the name of the paid
audience to which an individual belongs in Paid Media Manager.
Selecting the Google Analytics Event
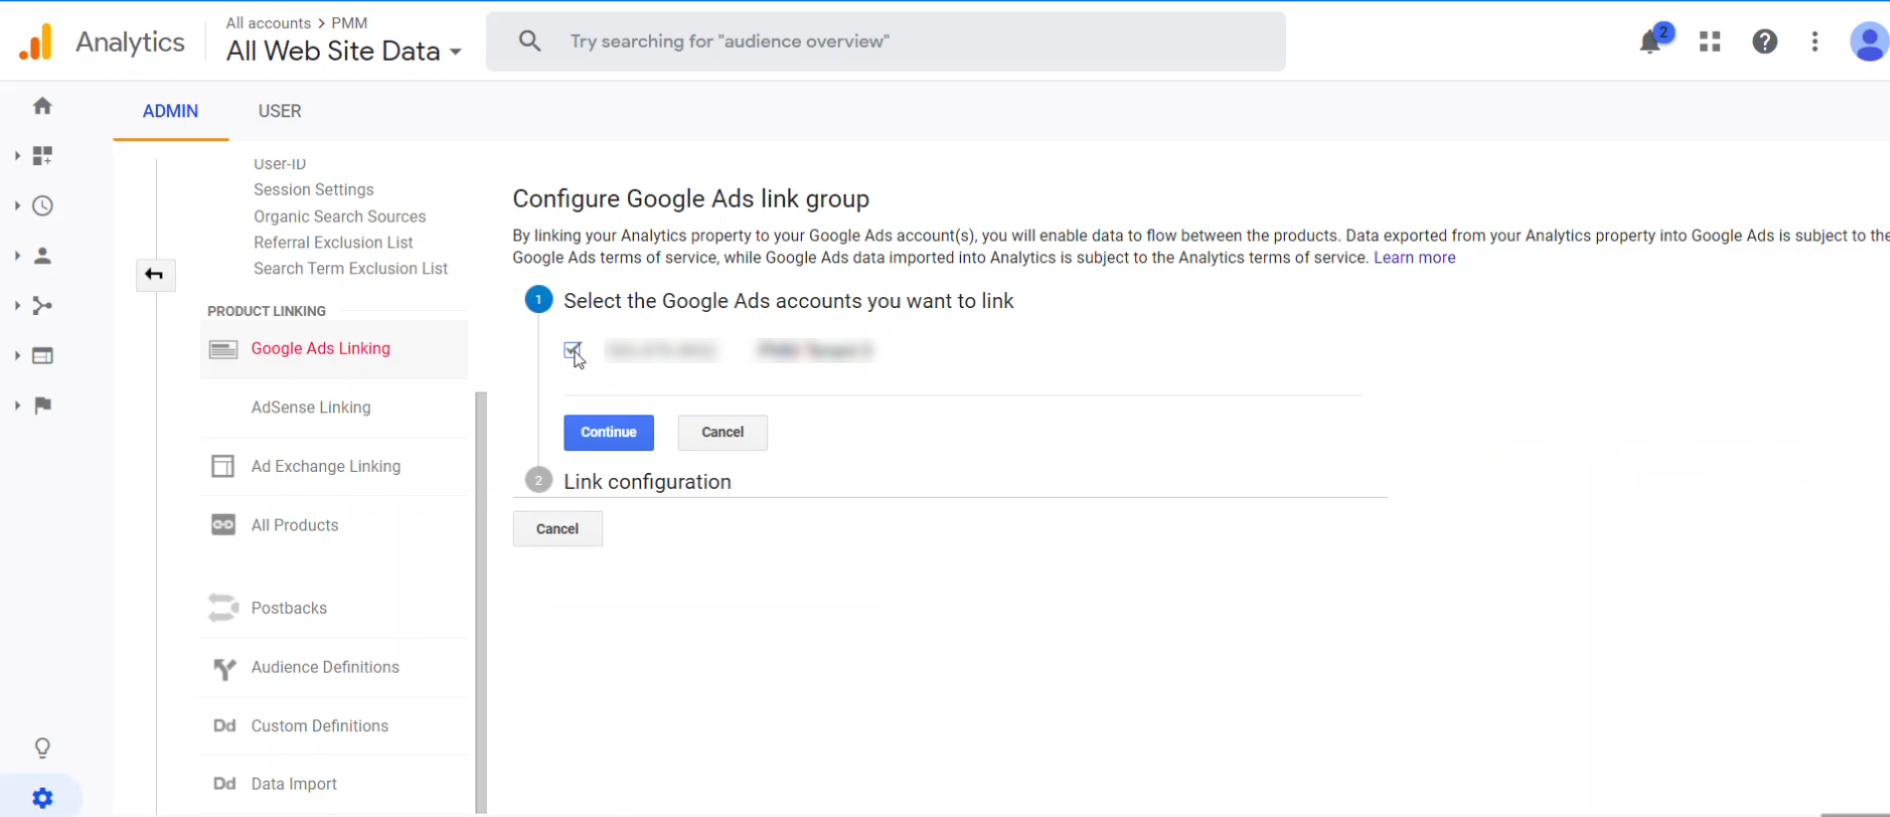
Add any other required conditions and select the Google Ads account
where the audience should be created.
Selecting the destination
Click Publish.
Result: You have implemented pixel-based APIs for two paid
destinations. You can now leverage the full fidelity of enterprise data and intelligence
to communicate the individual's Next-Best-Action to paid platforms, considering not only
their last interaction on a website, but also data about known individuals' interactions
with your ads. In this way, you can maximize your opportunities to target individuals
with ads based on their Next-Best-Action.
Previous topic
Enabling Next-Best-Action targeting on DMP-based destinations
Next topic
Enabling AI-driven advertising with paid click capture on Facebook Ads, Google Ads, and other platforms