Creating an Email channel
Ensure that your Email channel has integrations with necessary email accounts, and is properly configured for your system, for example, to support multiple languages and display your organization's unique branding in outbound emails. As a result, you ensure that users have an additional way to communicate with your application to ask for help or solve an issue.
For example, by creating an email bot for a travel agency you can help users book a flight by interacting with your application just by using email.- In the navigation pane of App Studio, click Channels.
- In the Create new channel interface section, click Email.
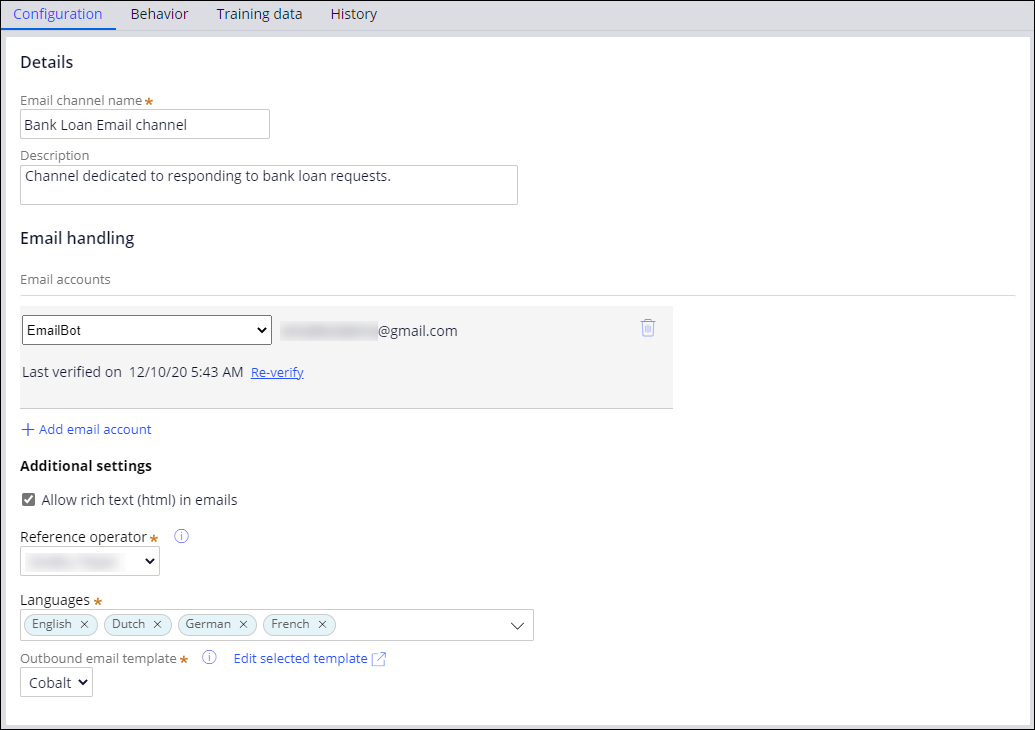
- In the Email channel name field in the Details section, enter a name for your Email channel.
- Optional: To explain the purpose of your email bot, in the Description field, enter a short description for the email bot.
- In the Email handling section, click Add
email account, and then select an email account.You set up at least one email account for the Email channel so that users know which email address to send their requests to the email bot.
- Optional: To verify that you can use the email account that you selected, click
Verify.For more information about troubleshooting email integration settings for the Email channel, see Troubleshooting email accounts in the Email channel.
- If you want to define additional email accounts for the email bot, repeat steps 5 and 6.
- Optional: To embed case identifiers in the email subject, in the Additional
settings section, select the Display case ID in
subject checkbox.By default, the email bot uses a secure threading mechanism by embedding an encrypted security code in the email body to track emails replies from customers and other stakeholders in the correct email thread for a triage case. However, if your organization requires that emails display case identifiers in the email subject, you can enable this option. For more information, see Email triage process.
- Optional: To enhance how information is presented in emails and triage cases and to
enable rich HTML text for the email bot, in the Additional
settings section, select the Allow rich text (html) in
emails checkbox.Enabling this option enhances how important information in the email is presented in the system, for example, in triage cases displaying conversations details from users.
- In the Additional settings section, in the
Reference operator list, select a reference operator
for your email bot.You select a reference operator so that the system automatically assigns the email triage case to a unique Pega Platform operator when an exception occurs. A reference operator is a Pega Platform user on behalf of whom service mails are created in the system.
- In the Languages list, select the languages in which the
email bot interacts with users.You select the languages in which the email bot processes emails so that the system can perform text analysis and provide automatic responses in the correct language. By supporting multiple languages in an email bot, you increase the availability of your application to users who speak different languages. You configure reply email templates for each language separately.
- In the Outbound email template list, select a template
for the system to use for outbound emails.You select an outbound email template so that email interactions with customers and other stakeholders have a consistent look and feel that represents the unique brand for your organization. The system provides you with three built-in templates. The Cobalt template uses a solid blue header with a light-colored logo and the system displays email threads in separate bubbles with the same blue top border. The Classic template uses a darker color logo on a gray background and the system displays the email threads in separate bubbles with a white background. The Clear template does not use any visible styles.
- Optional: To fit your business needs, modify the selected outbound email template:
- Click Edit template next to the Outbound email template list.
- Modify how the template looks by changing the email background color, logo, header, body, and footer information.
- Save the outbound email template rule that belongs to a locked ruleset
to an isolated sandbox so that you can test your changes, by clicking
Private edit.For more information, see Performing a private edit.
- Save the outbound email template rule to a ruleset by clicking Save as.
- Click Back to Pega App Studio.
- Click Save.
Previous topic Implementing an email bot for an Email channel Next topic Defining Email channel behavior