Configuring search groups
A search group identifies one input view and one result view that are used together, and the data page that is the source for the search properties. When a CSR selects how to search for a customer at the start of an interaction, they select one of the available search groups. Your application comes with the default search groups listed earlier in this section. You can change the name, sequence, and views for the default search groups, and you can add more search groups.
When configuring search groups, consider these best practices:
- Move the most frequently used search group to the top of the list. This will be the default selection for the CSR.
- Name the search groups to clearly identify the search type to the CSRs, for example, Contact info.
- Delete any default search groups that you will not use.
For information about how to configure the search fields and search views, see "Configuring search fields and adding search views" earlier in this topic.
- In the navigation pane of App Studio, click .
- Select how you want to modify the search groups:
- To add a new search group, click Add group.
- To edit an existing search group, click the search group name.
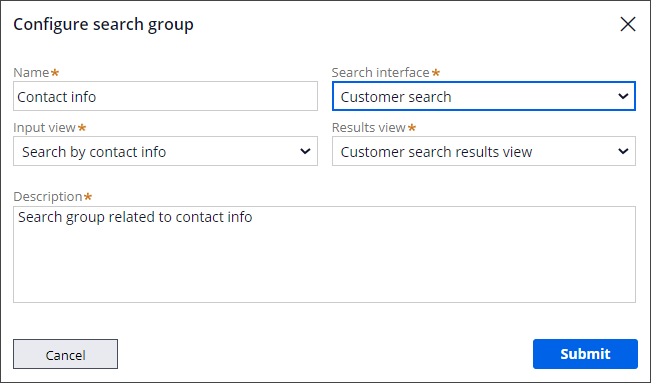
- In the Name field, enter a name that clearly identifies the search type to the CSR.
- In the Search interface field, select the data page that will
populate the views for this search.The default search groups both use the Customer search (D_CustomerSearch) data page, but you can add more data pages. For information, see "Adding a new data page for customer search," later in this section.
- In the Input view field, select the input view for this search group.
- In the Result view field, select the result view for this search
group.The following figure shows the values for a search group:
Search group fields 
- Click Submit.
- Define the default search group, and the sequence to display the other search
groups.
To move a search group, click and drag the Reorder icon
 .
.- Move the most frequently used search group to the top of the list so that it will be the default selection.
- Arrange the other search groups in descending order by priority.
- Click Save.
Previous topic Configuring search fields and adding search views Next topic Advanced customer search configuration
