Quality reviews and customer satisfaction surveys
Implement quality management reviews and customer satisfaction surveys by configuring the content and survey rules that determine the scoring criteria and questions asked in the survey.
Configuring survey rules
Pega Customer Service uses survey rules for both quality management and customer satisfaction survey processing.
- In the header of Dev Studio, enter and search for SampleQualitySurvey.
- On the Survey page, click Save as, select the Applies To class, and enter the name of the survey as the Purpose. Save it to your ruleset.
- Enter a short description for the survey. This value becomes the name of the survey.
- On the Scoring Levels tab, enter a title name for each scoring level. The titles appear when a user is responding to the survey.
- On the Questions tab, enter information in the fields described
below. All fields are required.
Fields Description Category Enter the name of the category to be evaluated. Question Enter the text question that is to be displayed to the person responding to the survey. Weight Enter the integer or decimal value that is used as a weighting factor when calculating the survey score for this category. Level 1-5 scores Enter the numeric score for each level that can be selected for the category. - Click Save.
Configuring survey rating categories
You can set rating categories for reviews and surveys that are based on the total survey score calculated by the system.
- In the navigation pane of Dev Studio, click App and then click .
- Click Save as, enter a map name, and save it to your ruleset.
- On the Matrix tab, update the table to include the following
items:
Field Description Total Score Enter the evaluation criteria as (for example, < or <) and total score. Overall Rating Enter the text that you want to associate with the score. Default Enter the default text; surround the text by quotes. - Click Save.
Configuring survey selection
With Pega Customer Service, you can differentiate surveys first by work type (the class name that the survey applies to) and then by decision rules that specify custom criteria.
- In the navigation pane of Dev Studio, click App and then click .
-
Select one of the following instances and save it to your ruleset.
- CADetermineQualitySurvey: Sample quality review survey
- CADetermineSatisfactionSurvey: Sample customer satisfaction survey
- On the Decision tab, enter the decision criteria and the name of the survey that you want to display.
- Click Save.
Determining interactions to survey for customer satisfaction
You can configure the criteria used to determine which customer interactions initiate customer satisfaction surveys.
- In the header of Dev Studio enter and search for SatisfactionSurvey.
- Click the Intent Task instance and save it to your ruleset.
- On the Criteria tab, add the Intent When rule Select as the Intent Condition.
- Indicate whether you want to suggest the process or queue the process when the condition evaluates as true.
- Enter the visual cue that you want to associate with the condition from the image catalog that is displayed when you click the Lookup icon
- Click Save.
Adding NPS fields to the Wrap Up page
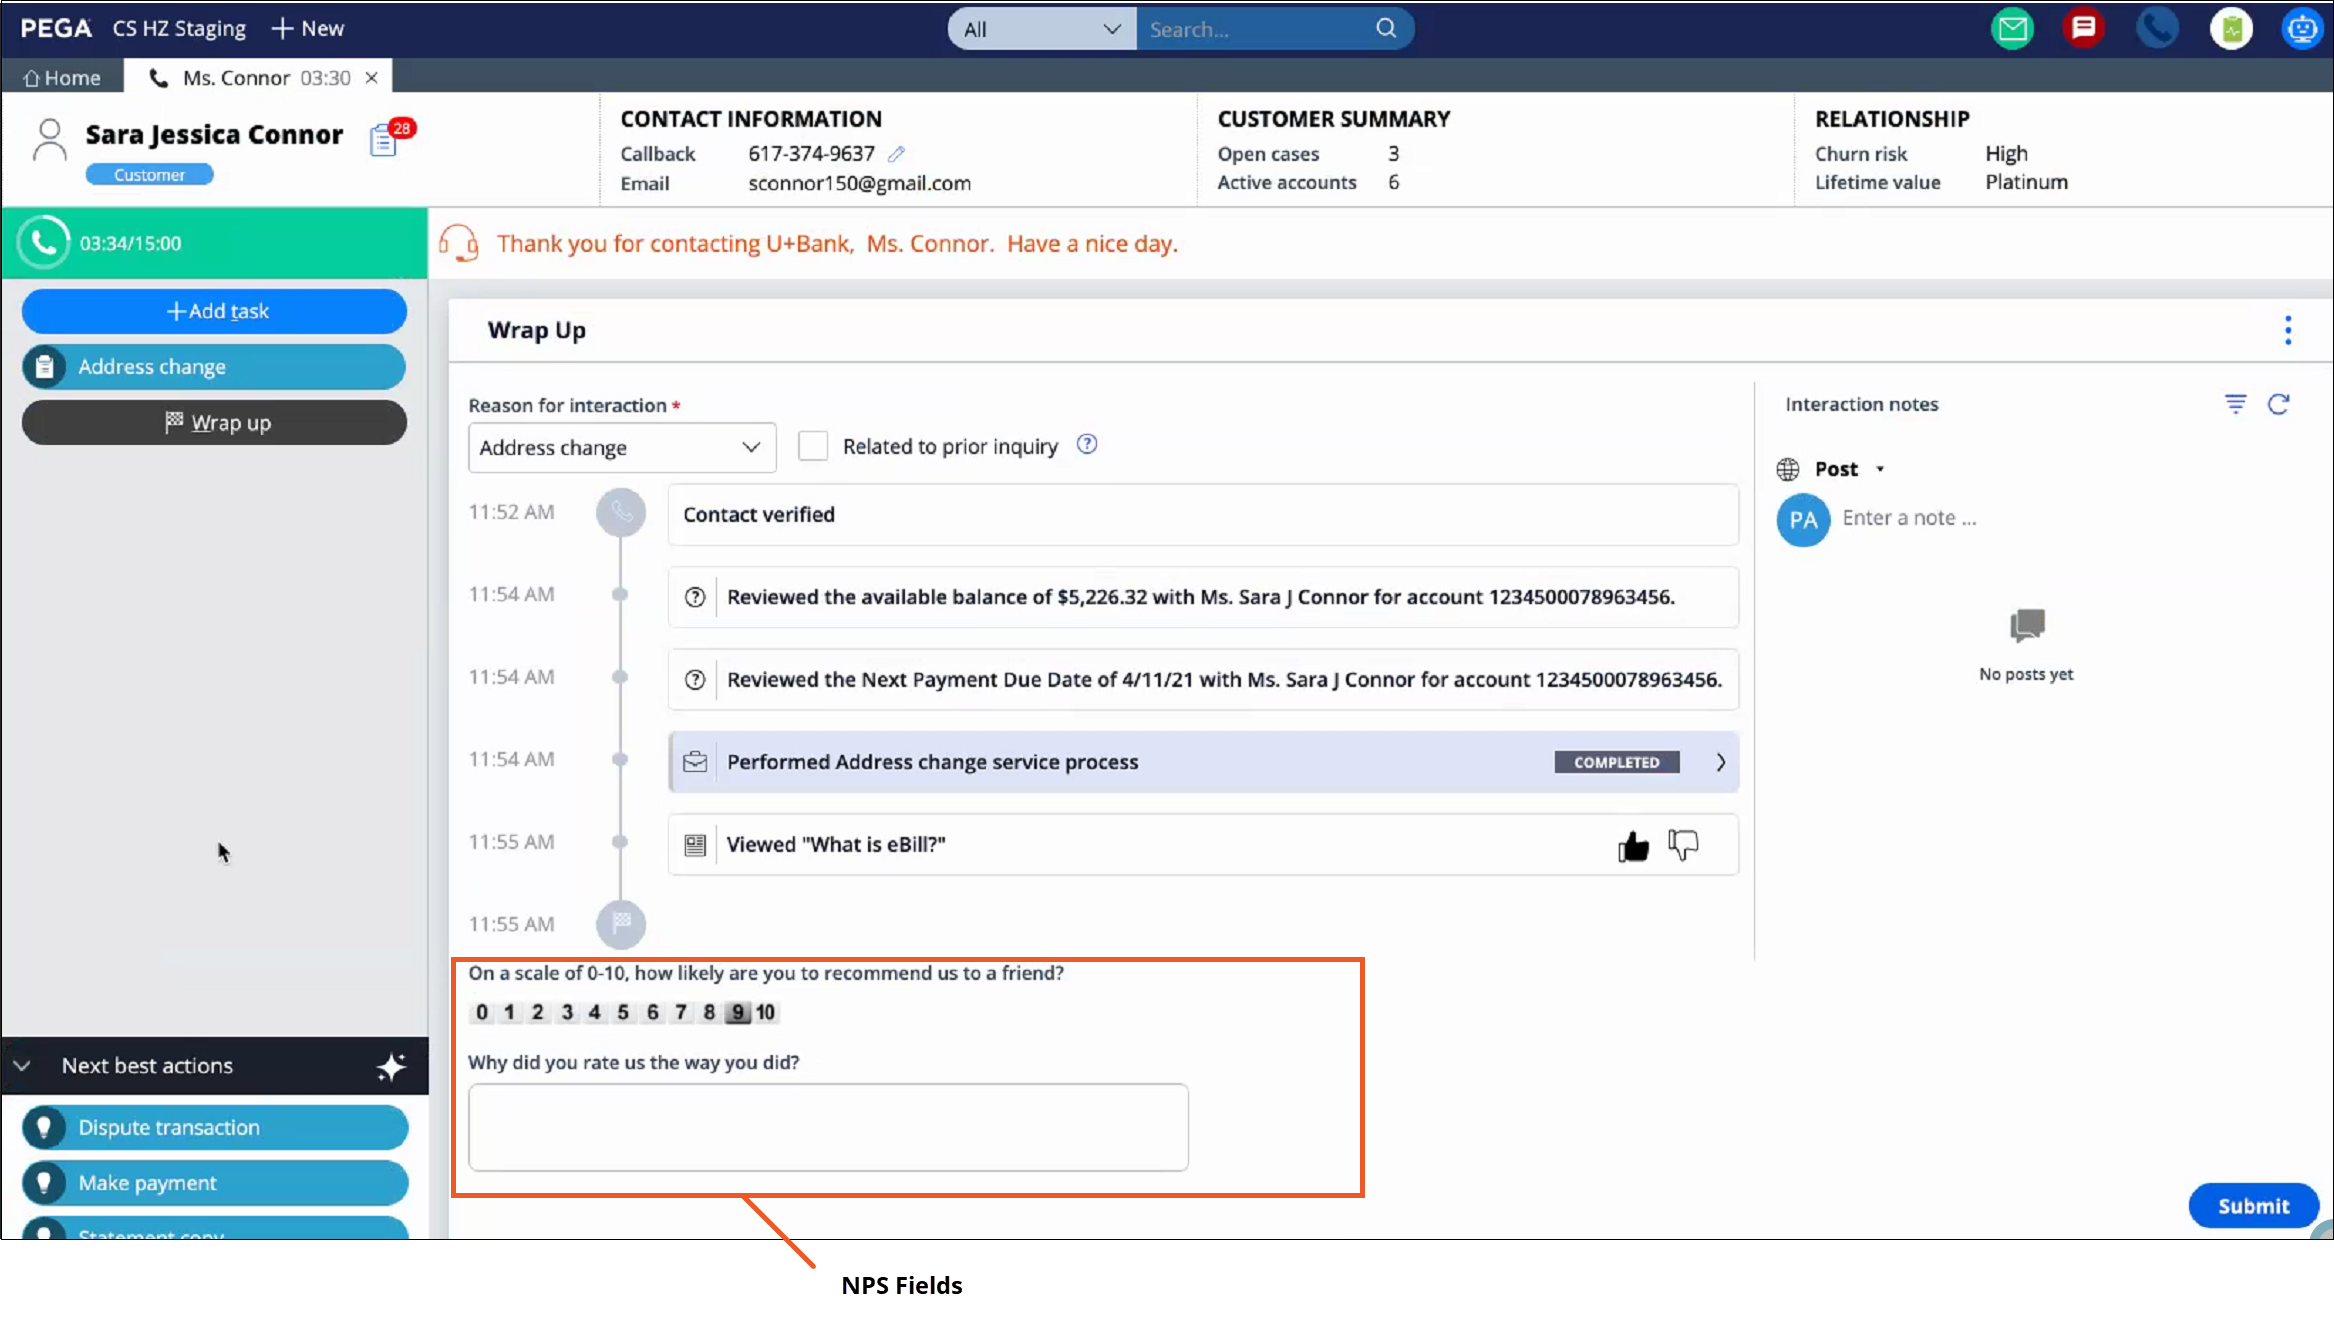
During interaction wrap up, a CSR can ask the customer to rate the interaction experience by providing a Net Promoter Score (NPS) value from 0 to 10 and comments related to that rating. The rating is saved as part of the interaction history, and it is used to drive future interactions with the customer. To collect NPS information during wrap up, add an embedded NPS section (NPSRatingInWrapUp) to the Wrap Up page (CAWrapUpCommon section).
The application puts the customer into one of the following NPS categories based on the rating:
- Detractor (0-6)
- Passive (7-8)
- Promoter (9-10)
The following figure shows an example of a Wrap Up page that includes the NPS fields:

You can add the NPS fields to the Wrap Up page for all interaction types, or just for selected interaction types. To add the NPS fields for some interaction types only, either save the modified Wrap Up section rule to the class for a specific interaction type (for example, PegaCA-Work-Interaction-InboundCall), or modify the layout properties for the NPS section so that the fields are displayed only for a selected interaction type.
- In the header of Dev Studio, search for and open the CAWrapUpCommon section.
- Add the NPSRatingInWrapUp section as an embedded section.
- Click Save.
Previous topic Configuring transfer reasons Next topic Configuring customer complaint journey

