Creating a New Attribute
In order to specify a new action detail, the backing proposition attribute must first be created.
Pega Customer Decision Hub
To add a new custom attribute:
- Go to the Proposition Management landing page. This page is accessible in the Pega Customer Decision Hub portal via: .
- Use the controls in the Hierarchy tab to perform the desired
action, as described in the following table.
To Do Create a top level attribute Ensure Top Level is selected under the Business issues & groups tree. In the Add list, select New property to launch the New form. Create an issue or group level attribute Select the appropriate issue and/or group in the Business issues & groups tree. In the Add list, select New property to launch the New form. - Specify the Name and Type of the new attribute in the Create Property form and click Create.
The next steps vary based on whether the application utilizes Decision Data rules to version propositions. Refer to Defining versioned propositions for more details.
- Application doesn't version propositions - No further action is needed.
- Application versions propositions - The new attribute must be added to the Decision Data rule of each group where it needs to be utilized. This process is described below.
Adding an Attribute to a Group's Decision Data Rule
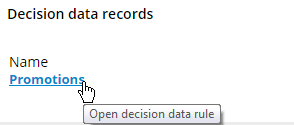
- Open the Decision Data rule for the group. This rule can be opened by clicking the
link in the Decision data records grid after selecting a group in
the Hierarchy tab of the Proposition Management landing page.

- Check out the Decision Data rule.
- Switch to the Form tab.
- If the Decision Data rule uses a custom form, add the new attribute to the desired location in the custom form following Pega Platform development practices.
- If the Decision Data rule uses the standard form, click Add field in the Form fields section. In the new row, find and select the newly created attribute in the Identifier column.
- Save the Decision Data rule and check it in.
Previous topic Custom Attributes Next topic Defining action flows
